Cisco Spaces Indoor Navigation Runbook (Cisco Validated)
OVERVIEW
This Cisco Validated overview document will provide a comprehensive overview of the process for deploying Cisco Spaces Indoor Wayfinding, a solution designed to enhance indoor navigation and user experience. The guide is structured to assist network administrators and IT professionals in effectively setting up and managing the indoor wayfinding system.
The introduction to Cisco Spaces Indoor Wayfinding briefly explains the purpose and benefits of implementing indoor wayfinding solutions within your organization.
In the system requirements section, it details the necessary versions and configurations of Cisco Spaces OS required for optimal performance. It also covers the essential hardware components and network specifications needed to support indoor wayfinding.
The configuration and deployment section includes steps for site preparation, such as mapping and planning the navigation paths. It provides instructions on setting up Cisco Spaces and integrating with existing network infrastructure. Additionally, it offers a detailed walkthrough of deploying the indoor wayfinding system, ensuring all components work seamlessly together.
Finally, the guide presents best practices that provide recommendations for maintaining system efficiency, including regular updates, monitoring, and user feedback mechanisms. It also includes tips for optimizing navigation accuracy and enhancing user engagement.
This guide aims to facilitate a smooth and successful deployment of Cisco Spaces Indoor Wayfinding, ensuring users enjoy a reliable and intuitive navigation experience.
SUPPORT AND ONBOARDING
Please follow the link below to find out about the different ways to get support for Cisco Spaces.
PREREQUISITES
This runbook should only be used as a follow on from the Spaces OS Runbook. Please refer to that document before progressing here.
In addition to the Spaces OS installation, below are the more specific requirements for Indoor Navigation.
Please note that Meraki managed wireless infrastructure is not currently supported but will have supportability at a later date.
Prerequisites Checklist
Area | Prerequisites |
Wireless Infrastructure |
|
| |
AP Deployment Density | 1 AP per 1000 sq.ft |
1 AP per > 1,000 <= 1,800 sq.ft. deployed with battery beacons | |
APs are within 8-15m of each other | |
AP Placement | APs accurately placed on network maps Catalyst:
|
Spaces Infrastructure | Cisco Spaces Connector 3.2 Virtual Machine (VM) with internet access to Spaces Cloud endpoints (firewall allow list and proxy requirements) |
Enable IoT Services - Advanced BLE Gateway enabled BLE Mode: BLE Transmit Mode (iBeacon) enabled (minimum requirement) Dual Scan and Transmit Mode (recommended for Indoor Wayfinding + additional Cisco Spaces BLE Gateway functionality) | |
Provide accurate CAD .dwg files for each floor in the EFT location (Best Practices - including walls, furniture, room labels/IDs, and other recognizable points of interest) | |
Deploy Cisco Spaces digital signage application on a Cisco Webex Board Pro / Pro 2 in the building lobby or central location to access wayfinding QR codes (firewall allow list requirements). |
AP Density Assessment
To find a rough estimate of the AP density for a given floor, the total number of AP’s on a given floor can be divided by the total square feet for that floor. From here it may provide an early indication if additional battery powered beacons need to supplement any gaps in the deployment that would lead to a suboptimal wayfinding experience.
There are a couple ways to assess the square footage of a floor. Here are two methods to get estimates.
Cisco Spaces AI Map Generator
The Cisco Spaces AI Map Generator is a website that will allow you to experience a quick, lightweight version of the Digital Maps that can be generated within the Spaces dashboard. It is as easy as uploading your .DWG file and then it will begin to process the floor plan. The output will provide you the square footage of the floor.
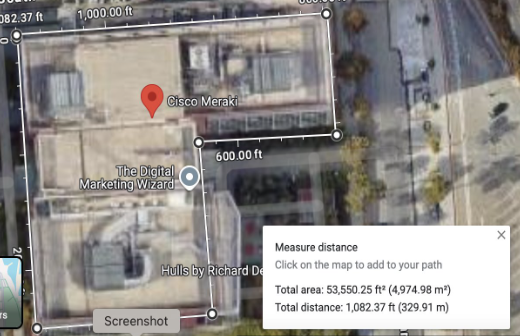
Google Maps
Google Maps is another alternative to estimate the square footage. Here are the steps for the floor size estimation.
smartspaces-Find-my-building-size.pdf
Go to maps.google.com and search for your location
Click Layers to see satellite imagery
Zoom in on your site using the plus sign
Right click on the map and select Measure distance
Click on the map to draw a polygon around the area you want to measure
Close the shape
Google Maps will automatically show the area measurement within the polygon
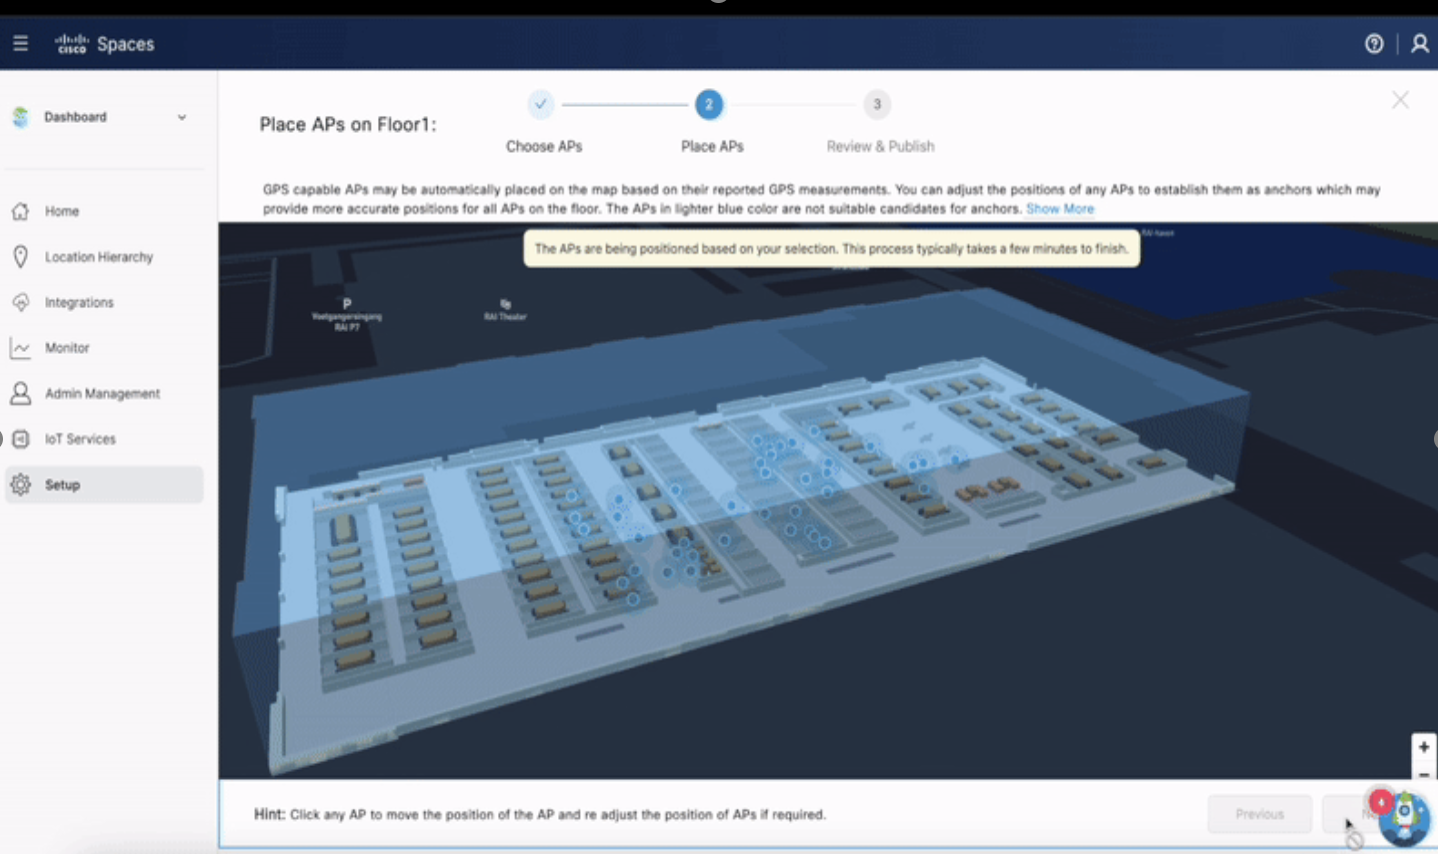
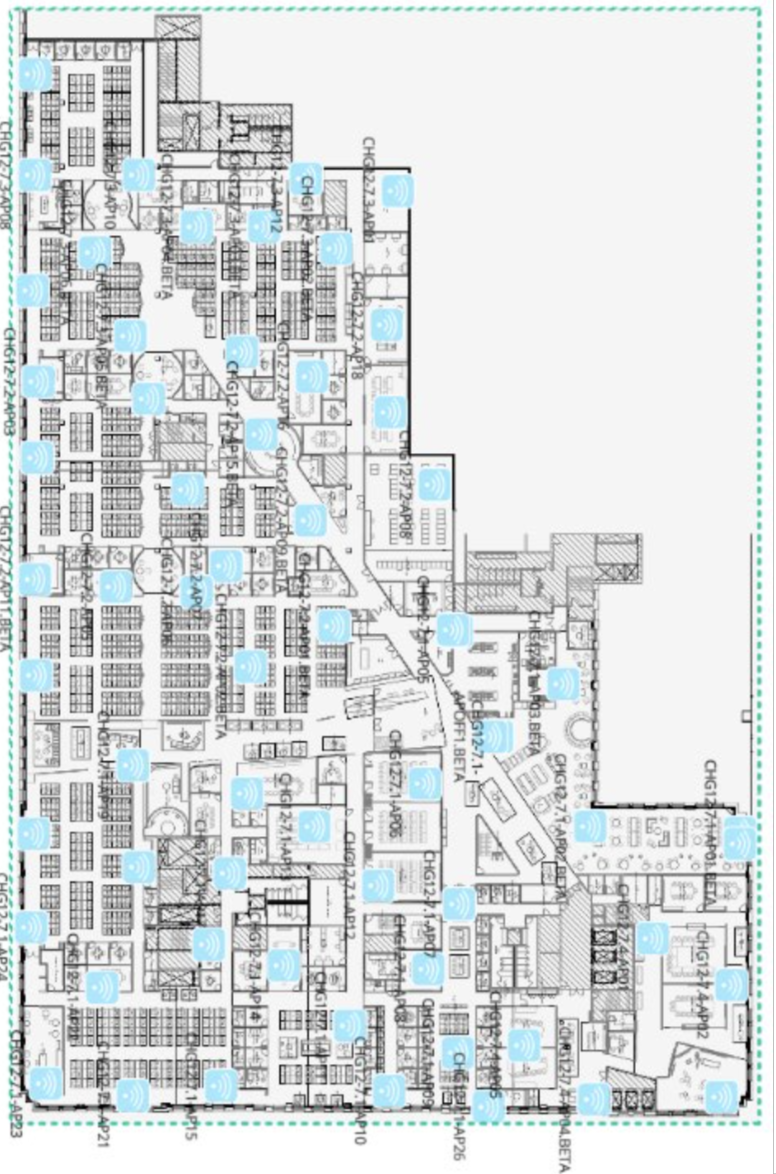
AP Placement Check
AP's needs to be accurately placed on network maps.
WLC managed AP's :
AP Auto Locate (preferred)
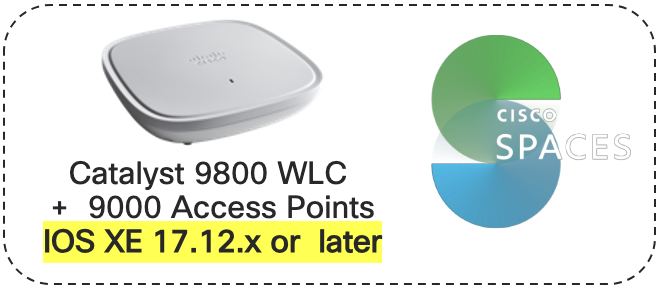
Note: WLC version 17.12.2+ (required)
AP placement on Catalyst Center (site survey to confirm AP location – required)
AP Auto Locate
AP Auto locate can provide most accurate information about AP placement
Detailed information and instructions can be found in this configuration guide :AP Auto Locate
AP Placement on Catalyst Center
A 4 or more (minimum of 3) GPS Markers are required, and each should be placed at least 20 meters apart from each other. This is to ensure proper scaling and orientation of Catalyst Center network maps when aligning with Digital Maps on Cisco Spaces.
More details on placing GPS markers can be found in the Spaces OS runbook.
BLE Beacon Guidance
Beacon Density | Typical Guidance | Additional Battery BLE Beacon Needed |
High density | 1 AP beacon / 700 – 1500 sq ft (65 - 140 sq m) Avg 1 per 1000 sq ft | Minimum or few beacons needed to cover gaps |
Medium density | 1 AP beacon / 1500 – 3000 sq ft (140 - 278 sq m) | Needs additional beacons |
Digital Map Processing
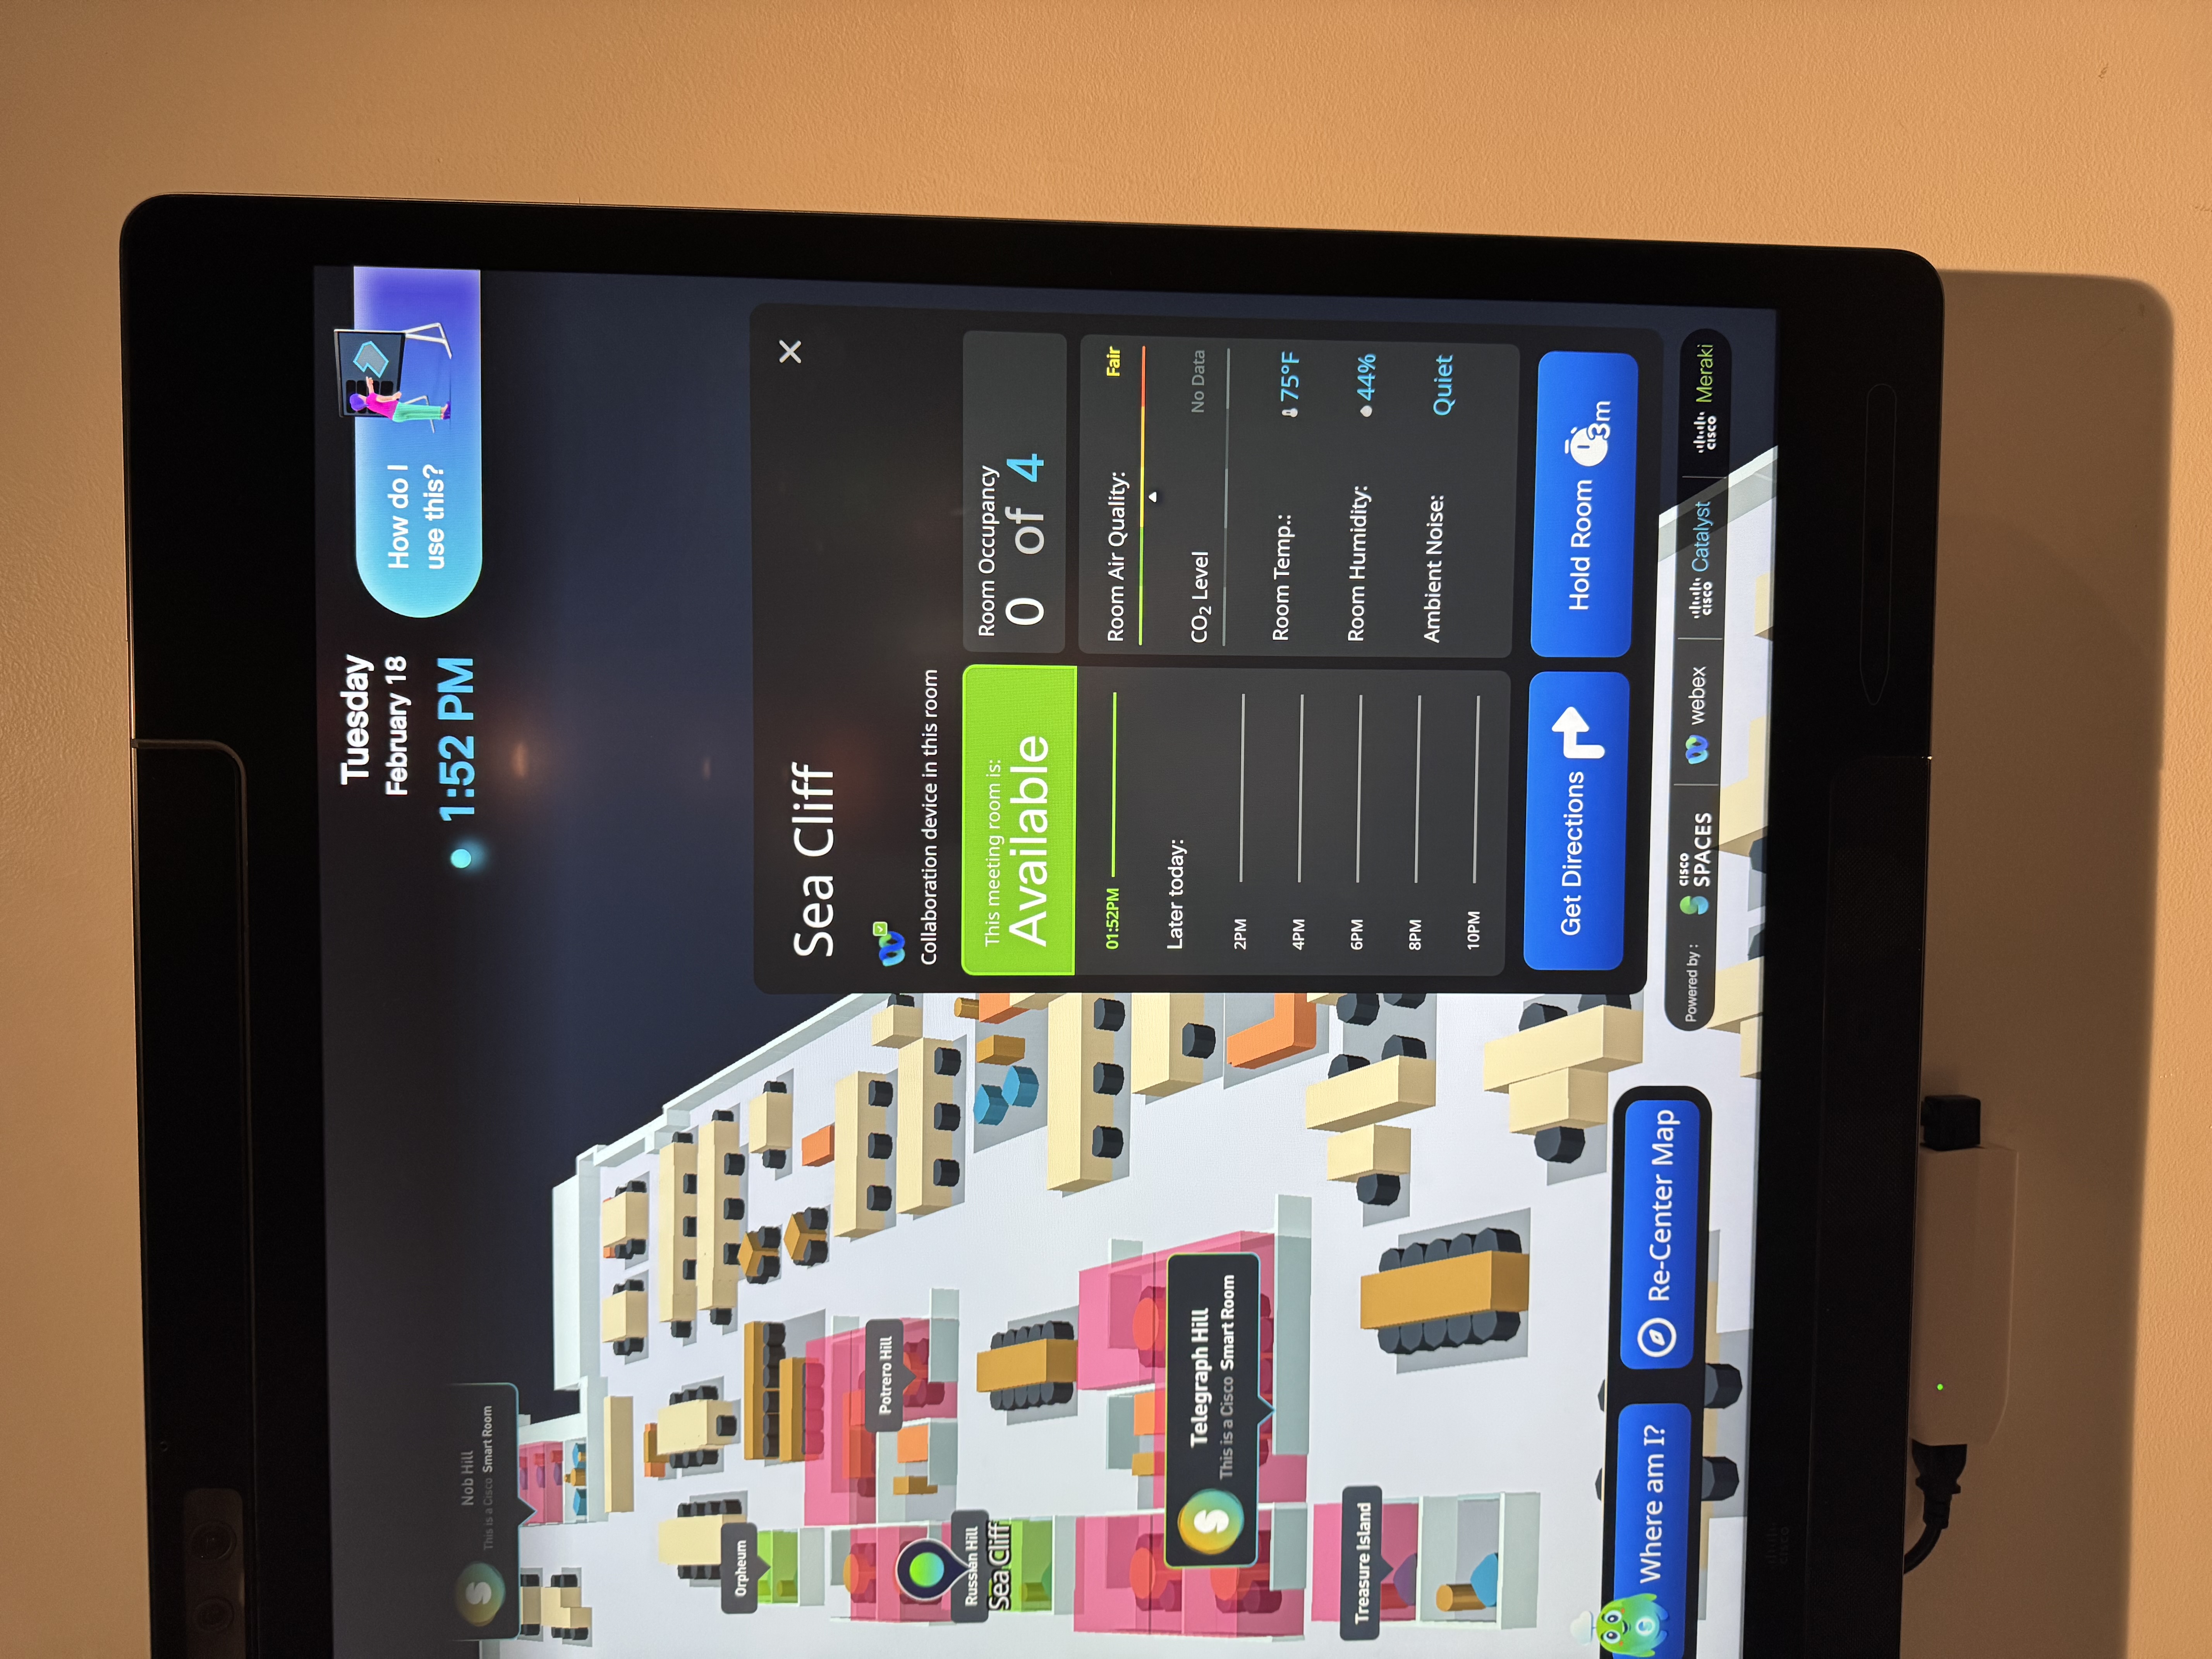
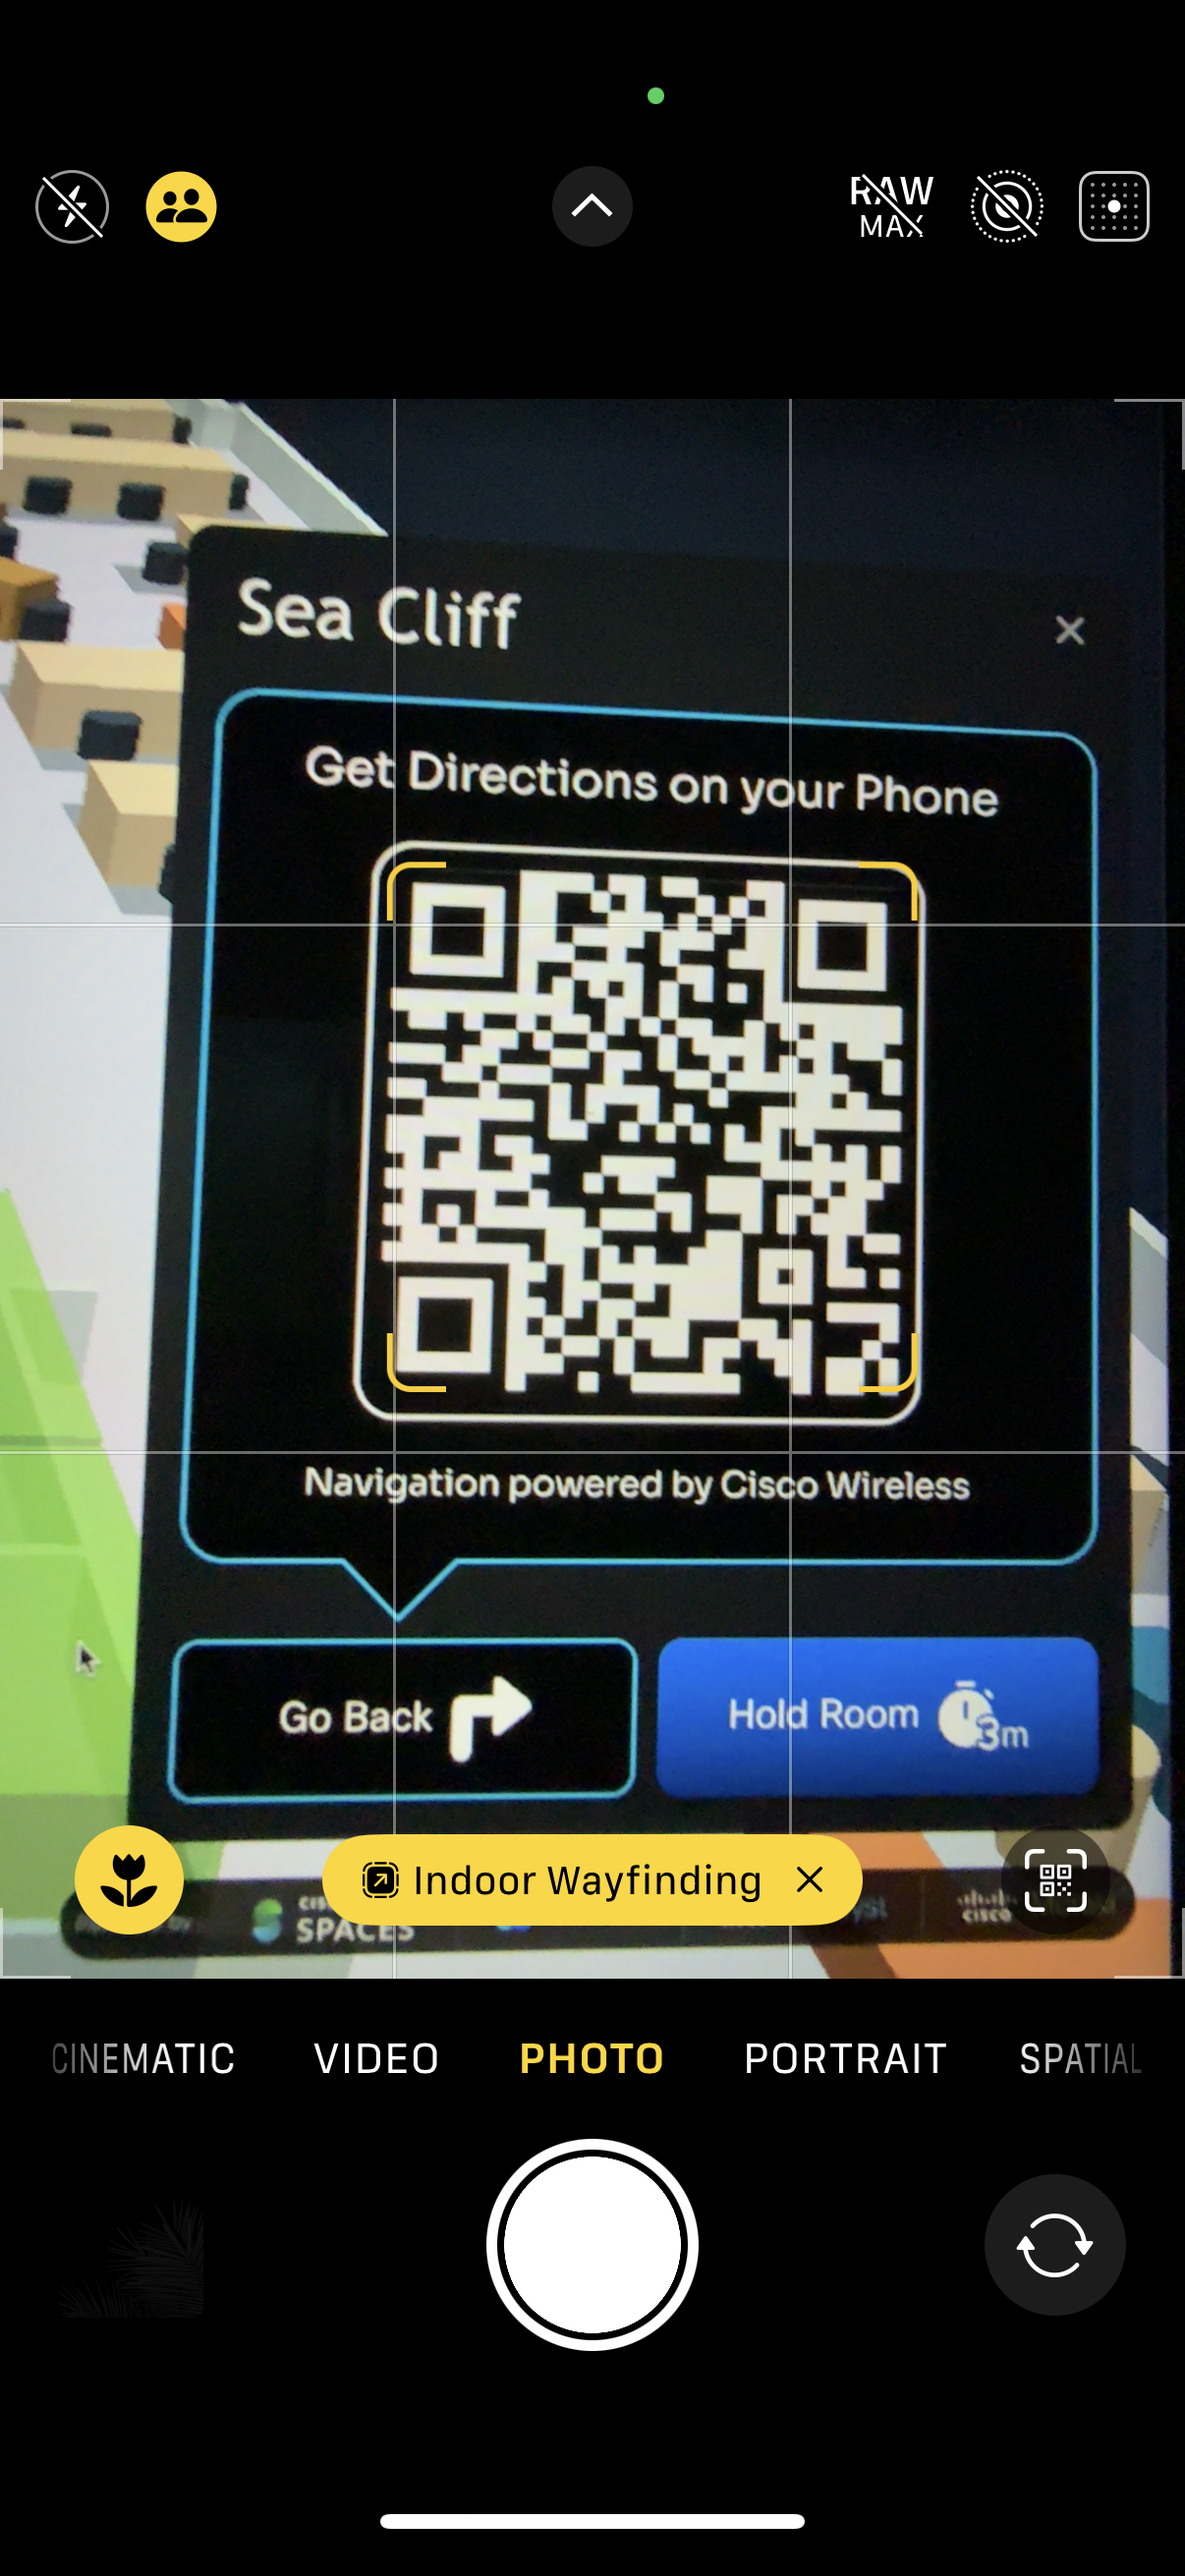
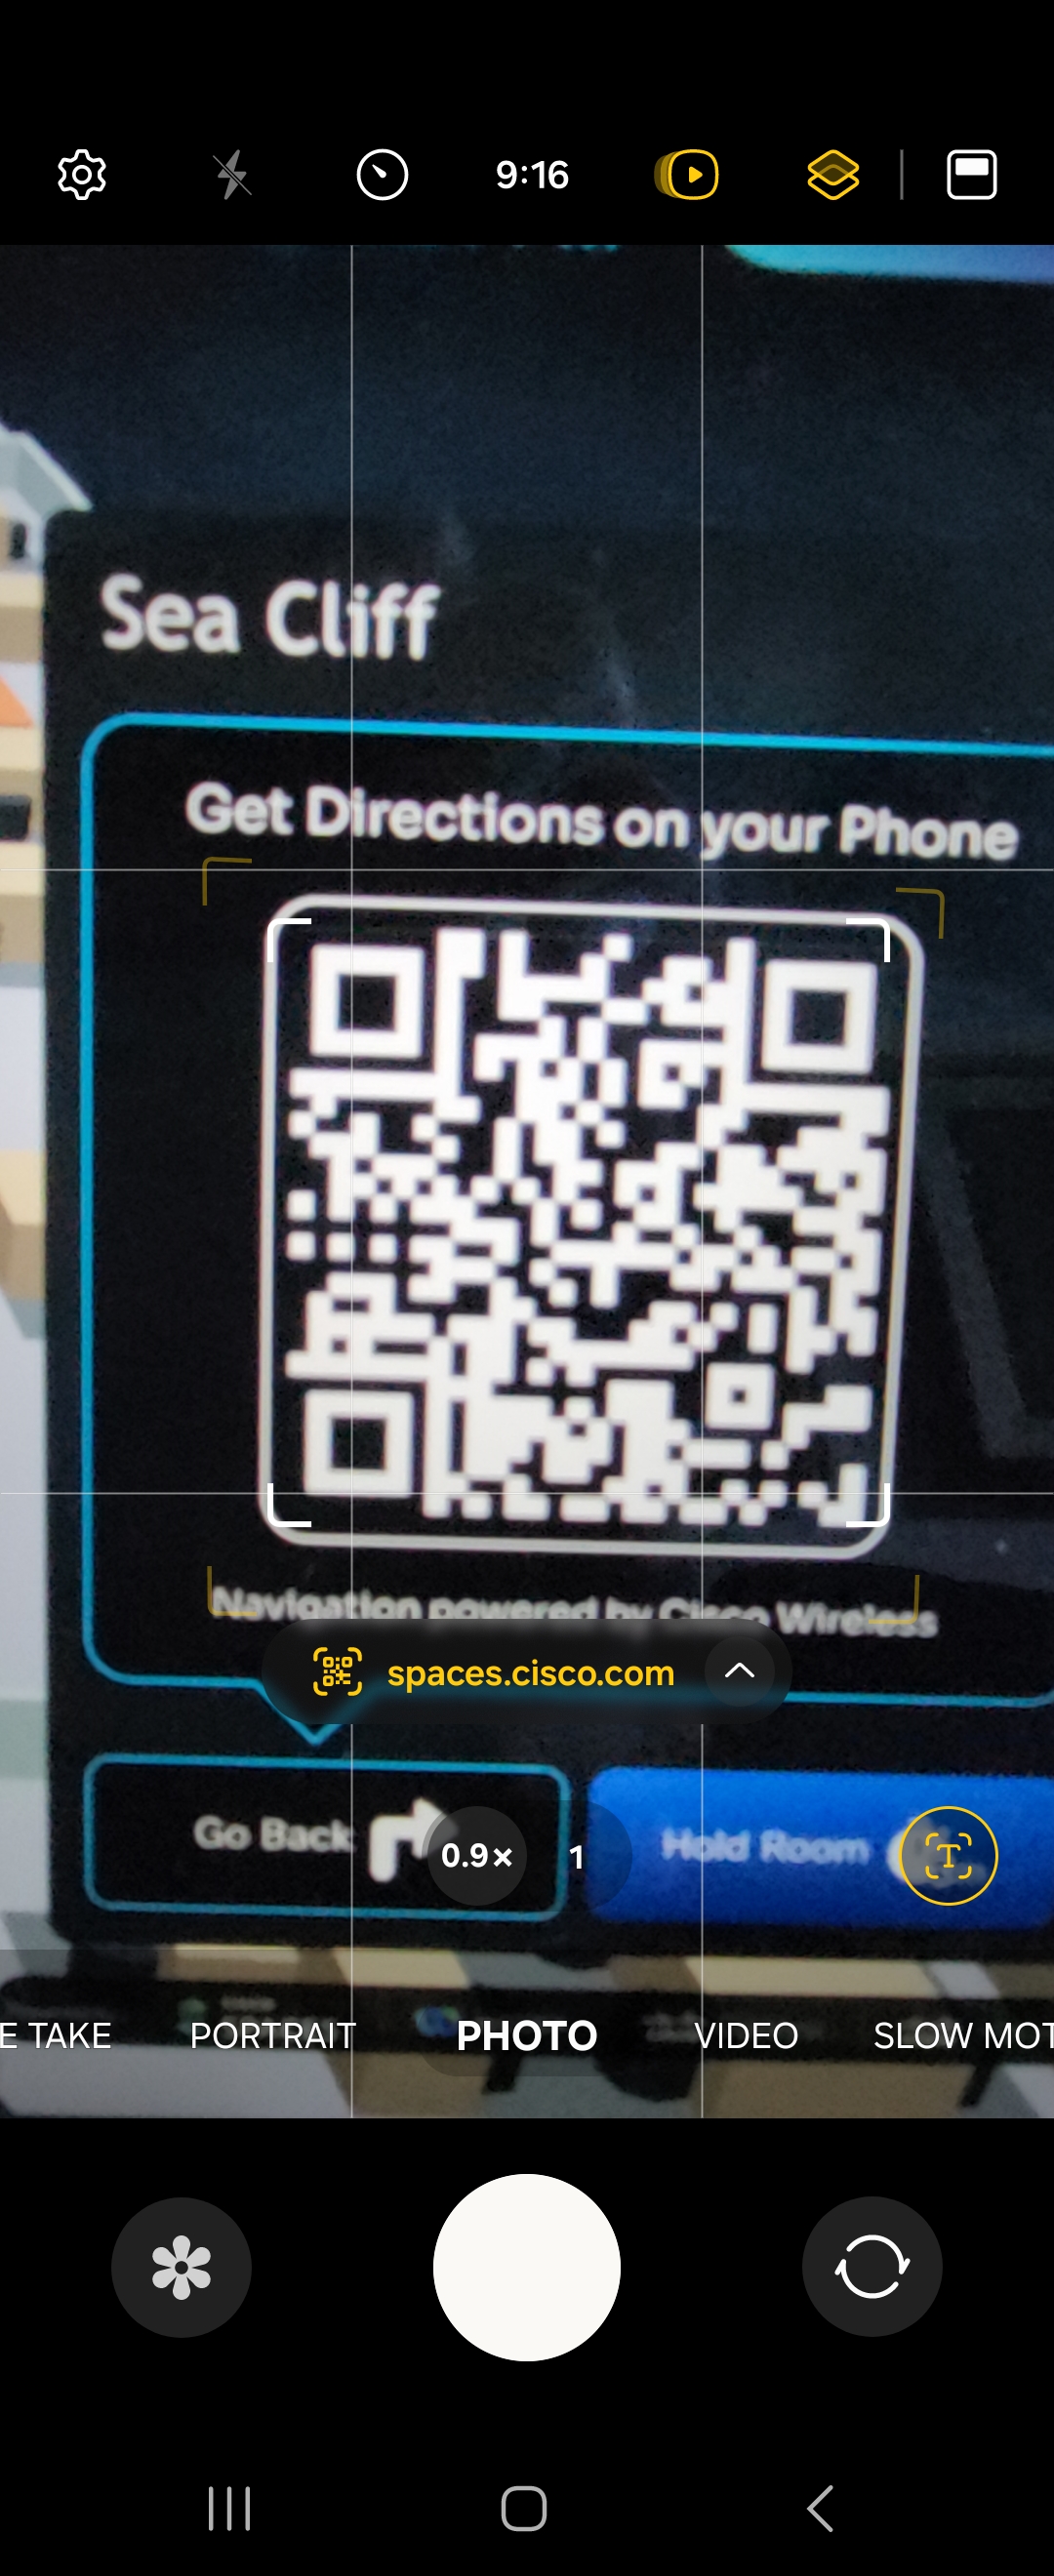
Digital maps are a necessary component for the wayfinding experience. It starts with a Digital Kiosk where the users will review the 3D visualized map of a floor space. Once they locate the destination on the Digital Map then they can select to option to get directions where a QR code will be presented. This is why it is necessary to have Digital Maps within the Cisco Spaces dashboard.
The Spaces OS runbook goes through setup and best practices for preparing the CAD files for processing the Digital Maps. If Digital Maps have not been created yet please refer to the Spaces OS runbook.
Digital Kiosk Readiness
Digital kiosk readiness is provided in great detail in the Spaces Smart Workspaces runbook. Please review that runbook for device compatibility and URLs that need to be reach for communication between the kiosk device and the Spaces cloud.
Ethernet based connectivity is recommended for kiosk device network connectivity. Otherwise, if using WiFi be sure to avoid using a network with a captive portal.
IMPLEMENTATION
To complete these steps, an admin will require read/write permissions within Spaces for Space Experience and IOT Services.
Deploying the Cisco Spaces Indoor Navigation solution involves several key steps. Starting with setting up the WebEx Collaboration Boards to serve as the initial touchpoints for the navigation experience. Next, configure the BLE radios to transmit the beacons necessary for accurate positioning calculations. Afterward, review the planned routes to ensure they offer optimal paths throughout the building. Finally, conduct a thorough verification of the entire navigation experience.
Below is a RACI diagram of the tasks detailed in subsequent subsections. This will provide a quick reference as to who is responsible for which tasks while Indoor Navigation is under Limited Availability.
Task | Customer (C) | Deployment Team (DT) |
|---|---|---|
| R/A | I |
| I | R/A |
| I | R/A |
| I | R/A |
| R/A | C |
| I | R/A |
Legend:
R (Responsible) – The role that does the work to complete the task.
A (Accountable) – The role ultimately answerable for the task’s completion.
C (Consulted) – The role providing input or expertise.
I (Informed) – The role kept up to date on progress.
Configuring Digital Kiosk
Configuring the digital kiosk is detailed in the Spaces Smart Workspaces runbook. Please refer to this documentation for configuration details.
While Indoor Wayfinding is in Limited Availability the Spaces deployment team will need to enable a feature flag to enable pathfinding for the kiosks.
Configuring the BLE Radios
For this section related to configuring the BLE radios, bulk configuration of the BLE radio settings & UUID assignments is possible and can be managed by the Spaces Indoor Wayfinding deployment team while Indoor Wayfinding is in Limited Availability.
The sections below on configuring BLE services are for reference only as the configuration can be done in bulk by the deployment team.
How to Configure BLE Services in Cisco Spaces
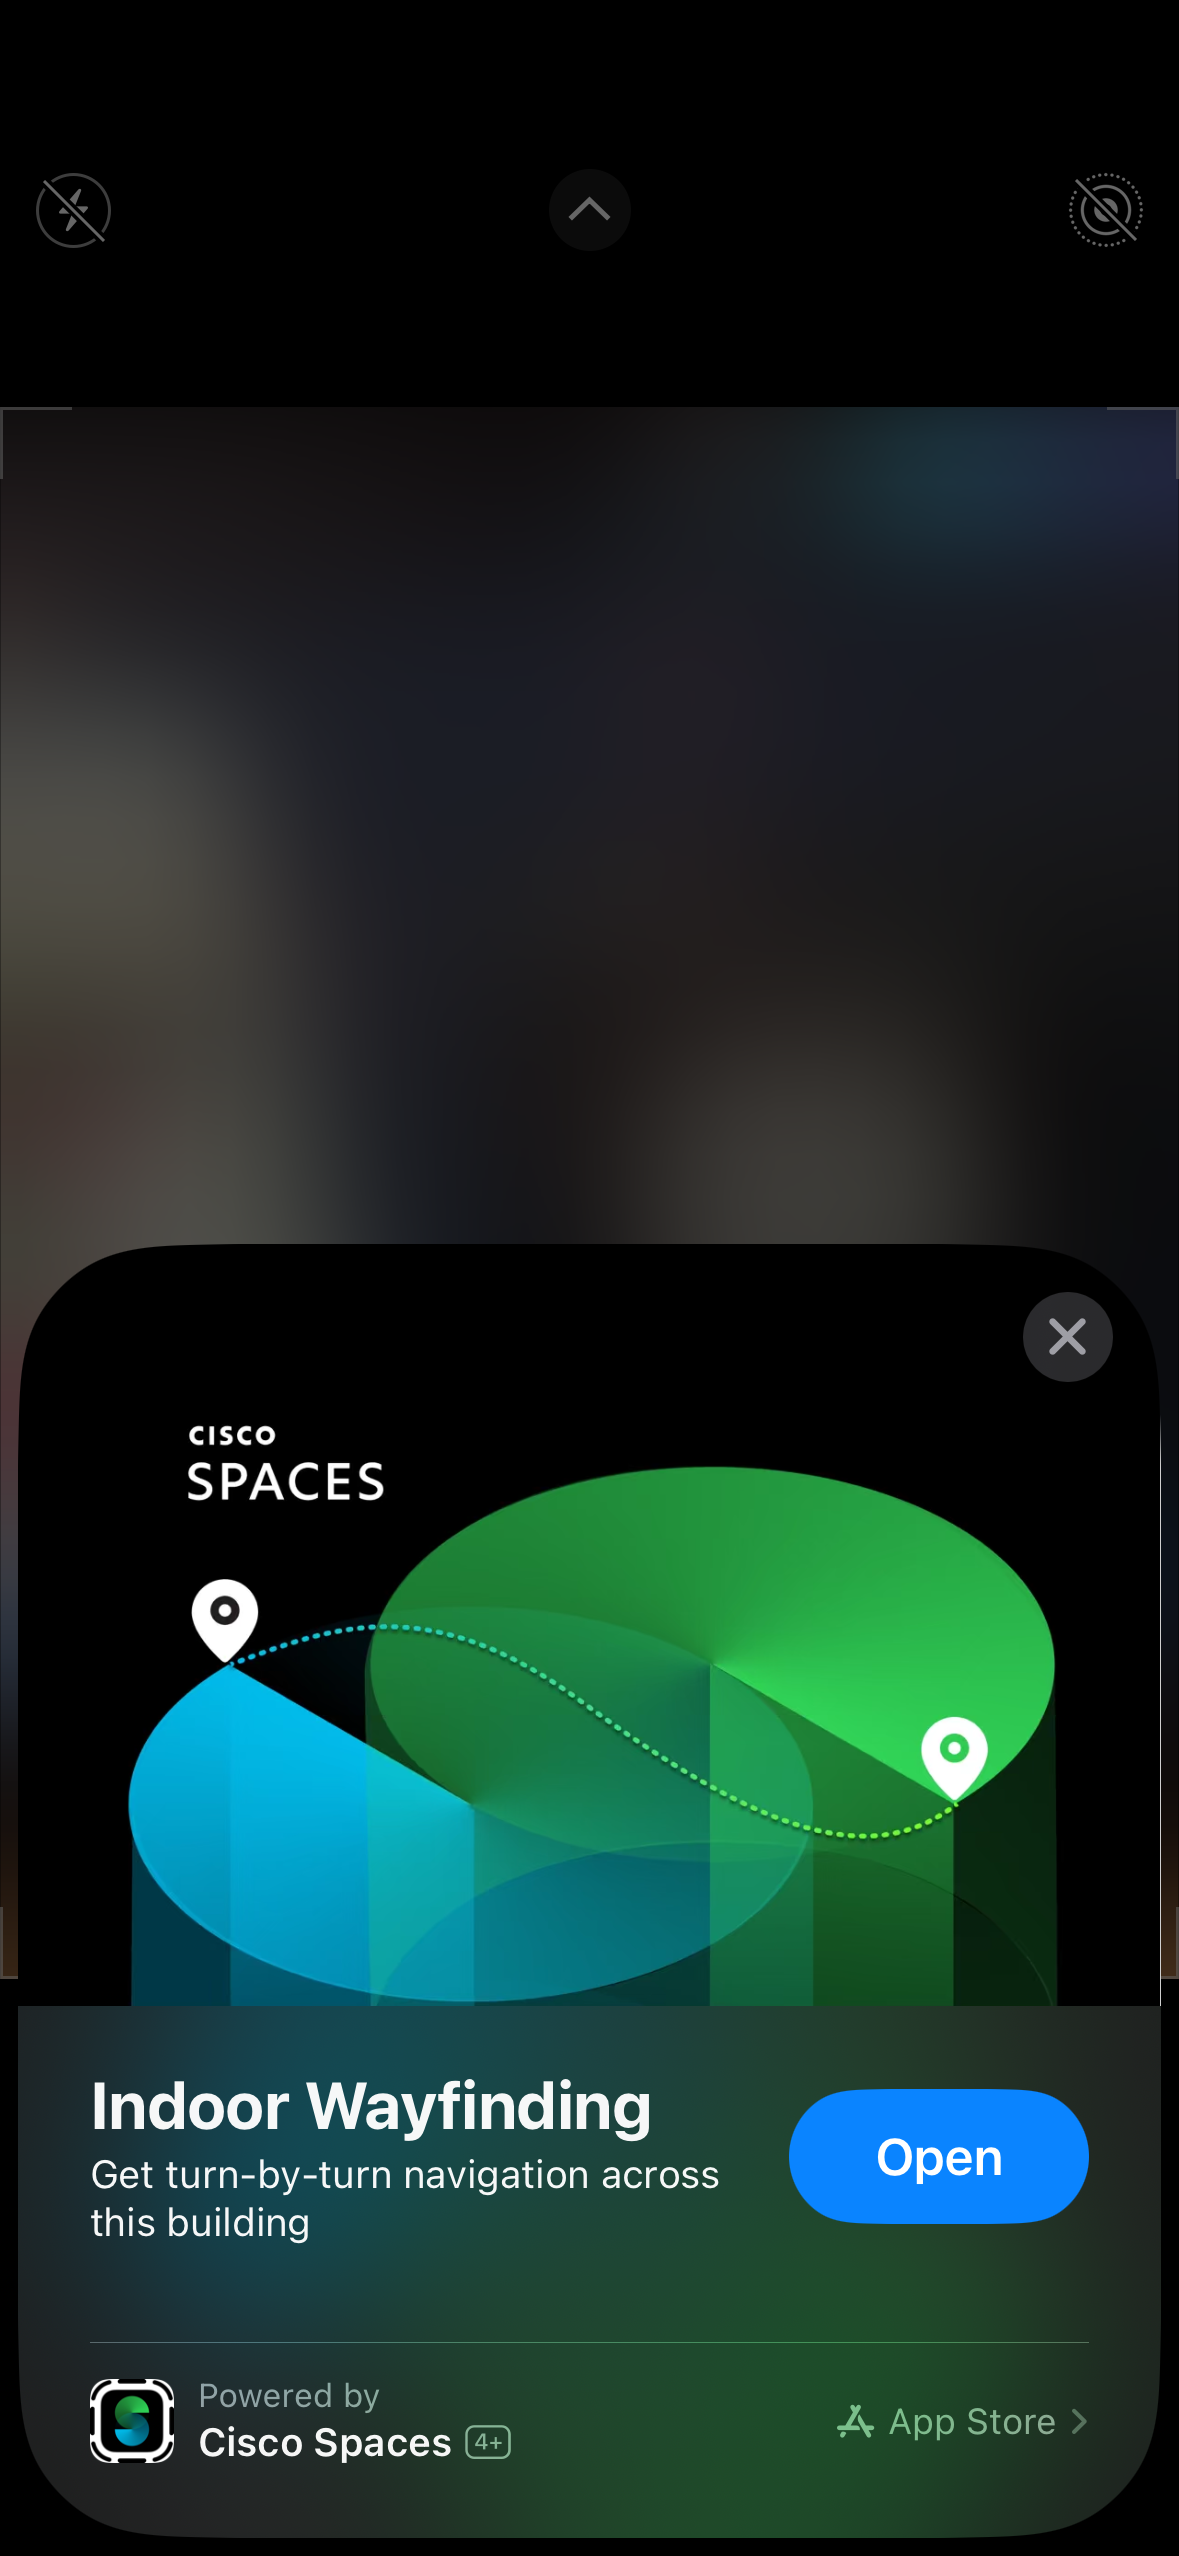
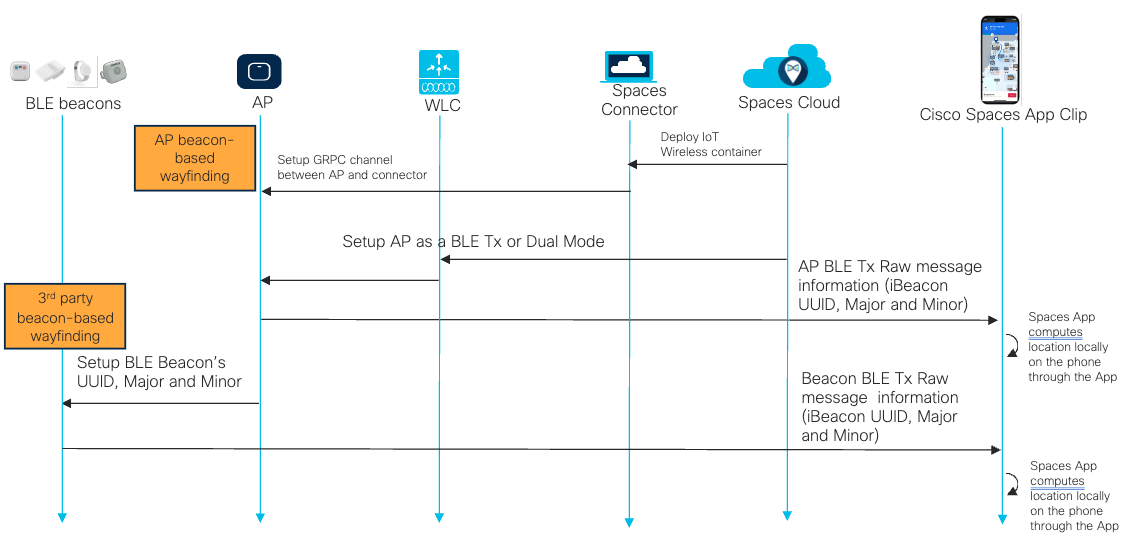
With accurate placement of AP's on the network map and geo-alignment with the fully geo-referenced Cisco Spaces Digital Maps Pro, the Cisco Spaces iOS App Clip can render a map + AI drawn paths + calculate its own location on-device.
 | 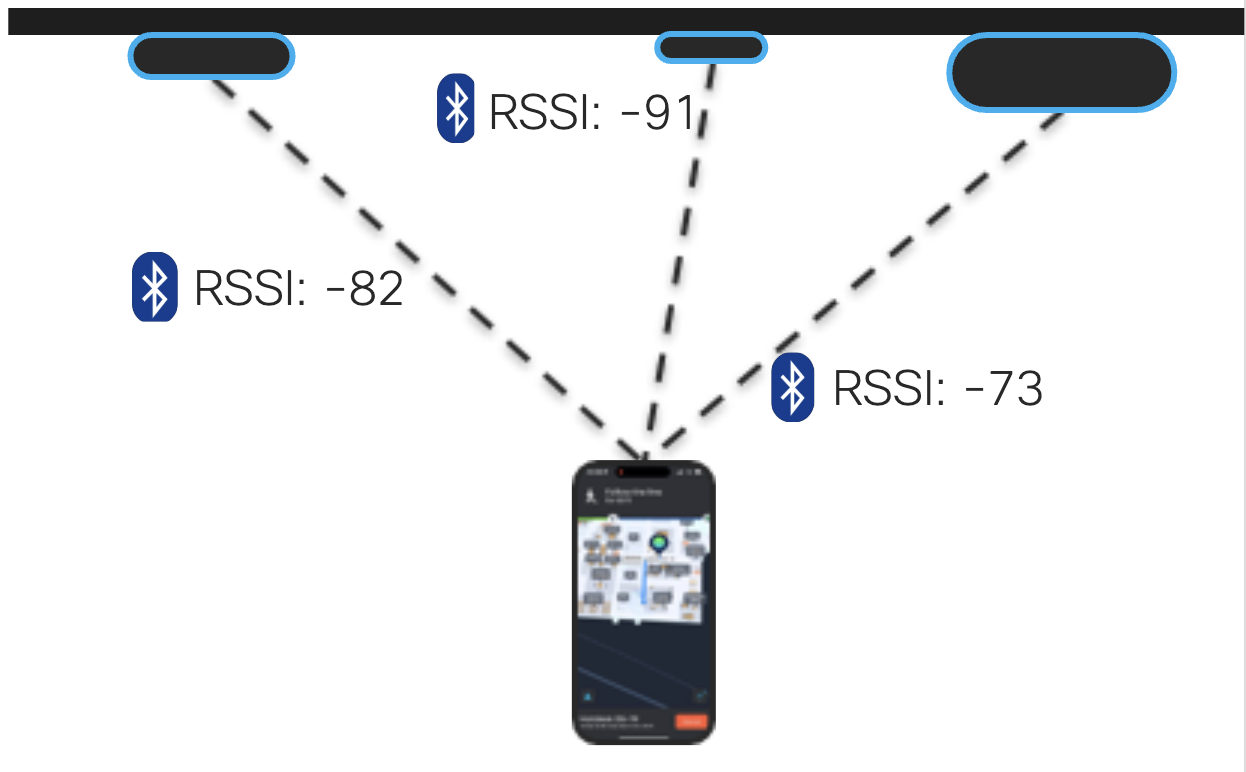 |
Indoor wayfinding uses BLE on AP's (or additional battery beacons), and those BLE beacons need to be transmitting the signal, which can be captured by Mobile application to calculate its own position on the map.
The steps for configuring the BLE radios is as follows:
Enable IoT Services
This is part of the Spaces OS runbook and is a prerequisite for the Indoor Navigation outcome. Please visit the Spaces OS runbook if this has yet to be done.
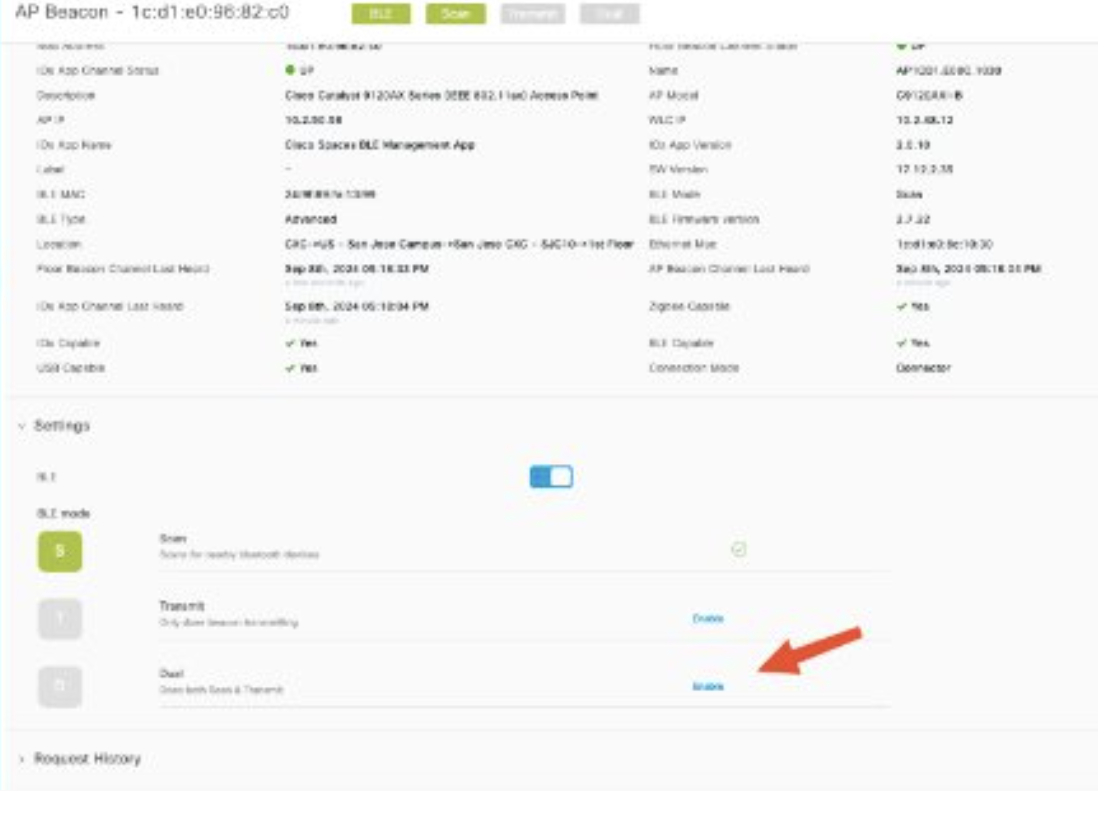
Enable BLE mode (through the Spaces dashboard menu IoT Services). There are two options for this below:
Need to BLE Transmit Mode (iBeacon) enabled (minimum requirement). Detailed steps are here: Configuring AP as a Beacon in Transmit mode

Dual Scan and Transmit Mode (recommended for Indoor Wayfinding + additional Cisco Spaces BLE Gateway functionality). Detailed steps are here: Configuring AP as a Beacon in Dual mode
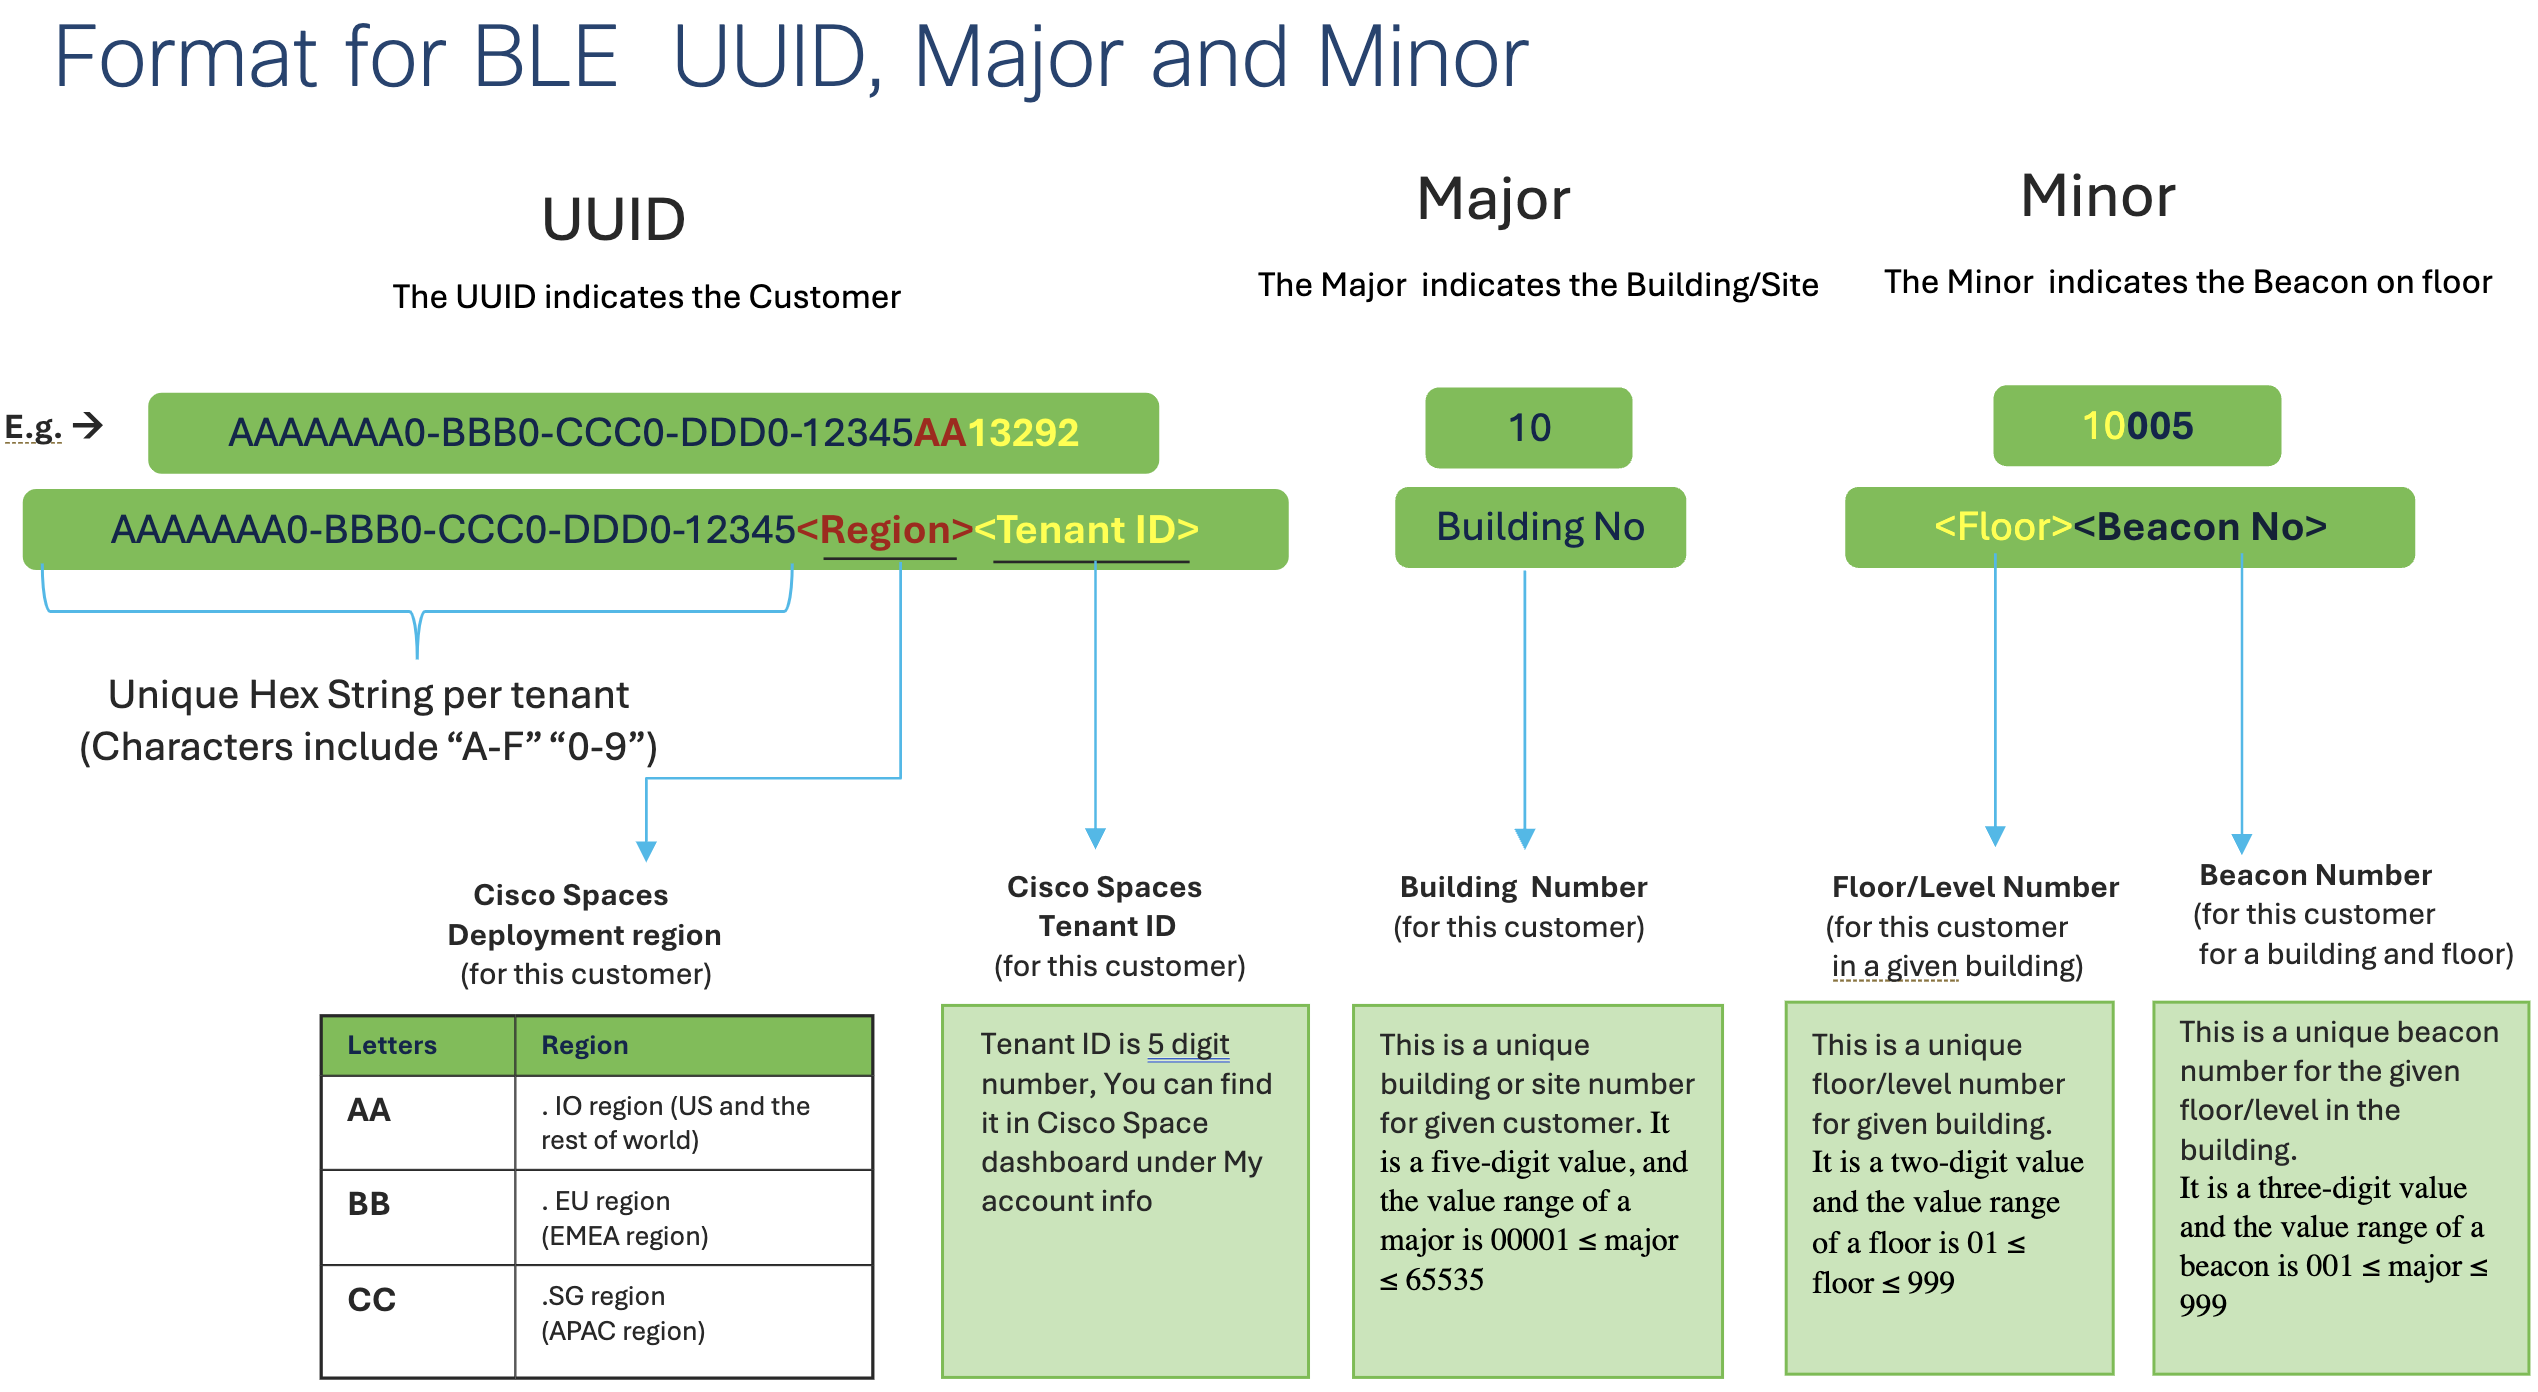
BLE Formatting Schema
A naming convention for the BLE beacons is to be used. The format for the UUID, major, and minor values that leverage the Spaces tenant ID, a building enumeration, the floor number, and a beacon enumeration. See below for the schema.
Recommended BLE Configuration
Power (dBm) : -8/-9
Controls the beacon signal range. -12dBm gives an approximate range of 20 meters and +4 dBm an approximate range of 70 meters.
Adv. Tx power : -70
Expected RSSI at a distance of 1 meter from the beacon. Usually between -60 to -70 to indicate immediate proximity at 1 meter.
Adv. Interval : 330
Time between consecutive beacon broadcasts. Usually between 100 to 750ms
Path Drawing Review
A path drawing review will be be performed with the specified point of contact from the Cisco Spaces team. Verification of the path drawing to various rooms on the floor are taking the appropriate route is performed in this review. If any edits are needed, due to consideration needed for glass walls, furniture, or areas to be avoided, for any of the routes they can be made at this time.
Path drawing screenshot
Verify the Wayfinding Experience
On-Site Beacon Validation and Accuracy Testing
After all of the prerequisites and setup has been completed the last part is the walk test and accuracy testing. If deployment assistance has already been prearranged then an engineer from the Cisco Spaces team will be scheduled to come onsite to perform these activities.
Walk Test
The walk test is done to cover several items related to the BLE beacons in the environment:
Verify beacons received accurately
Verify adequate beacon coverage
The walk test uses specific beacon recording software that is downloaded to a mobile device. A predetermined route is provided with a start and end indicators for the specified floor.
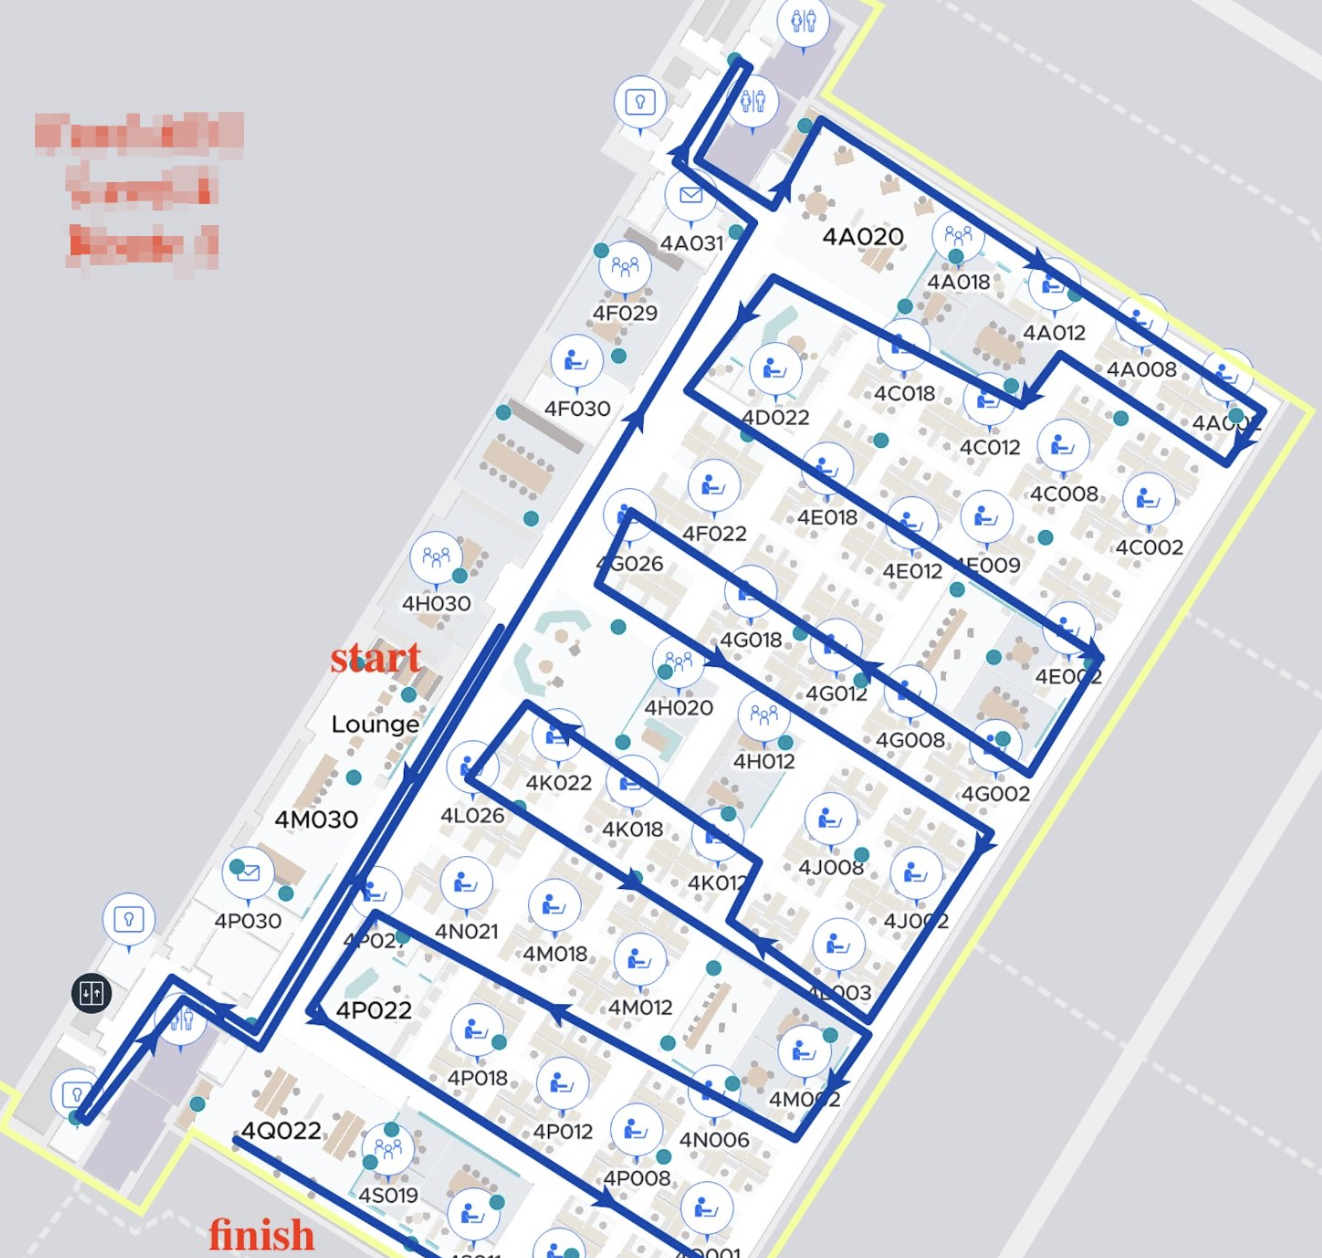
Walk test path example
After the walk test is concluded the file will be uploaded to the cloud for review. The Cisco Spaces team will review the results within approximately one week and provide a report. The report may be accompanied with any recommendations for gaps found in the coverage, unless the deployment involves an onsite engineer from Cisco Spaces. In which case, such items will be assessed at that time.
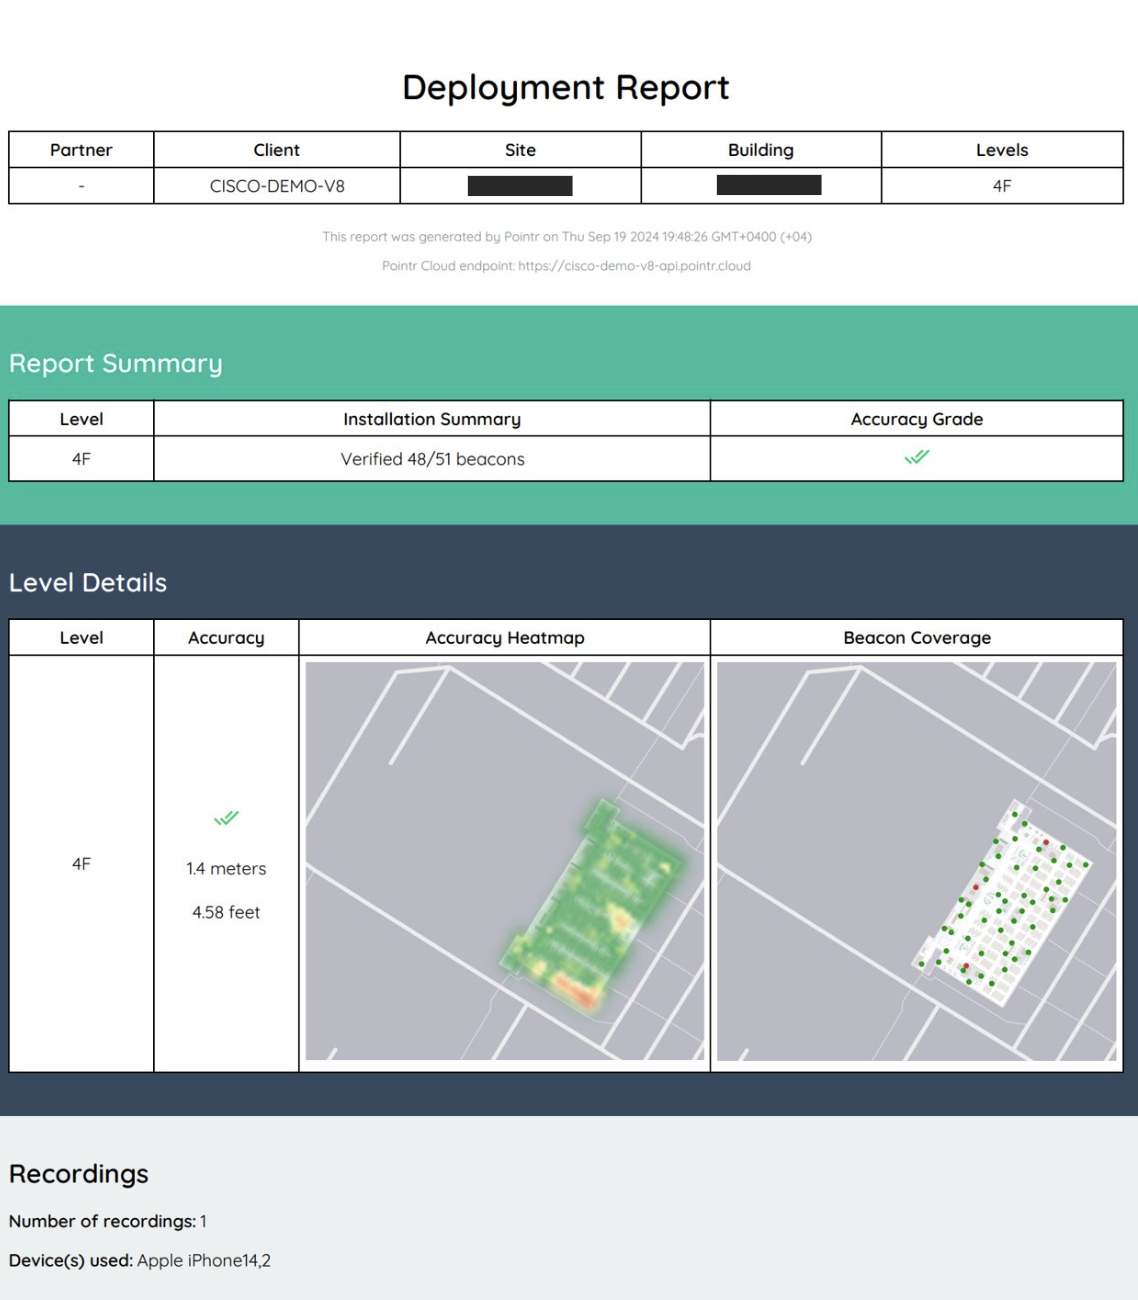
Example walk test report
Accuracy Testing
If a Cisco Spaces engineer is dispatched onsite accuracy testing will be performed by testing various routes on the floor to ensure proper accuracy of the blue dot on the mobile device. If any gaps or issues are found then recommendations will be provided and/or made to ensure a positive wayfinding experience.
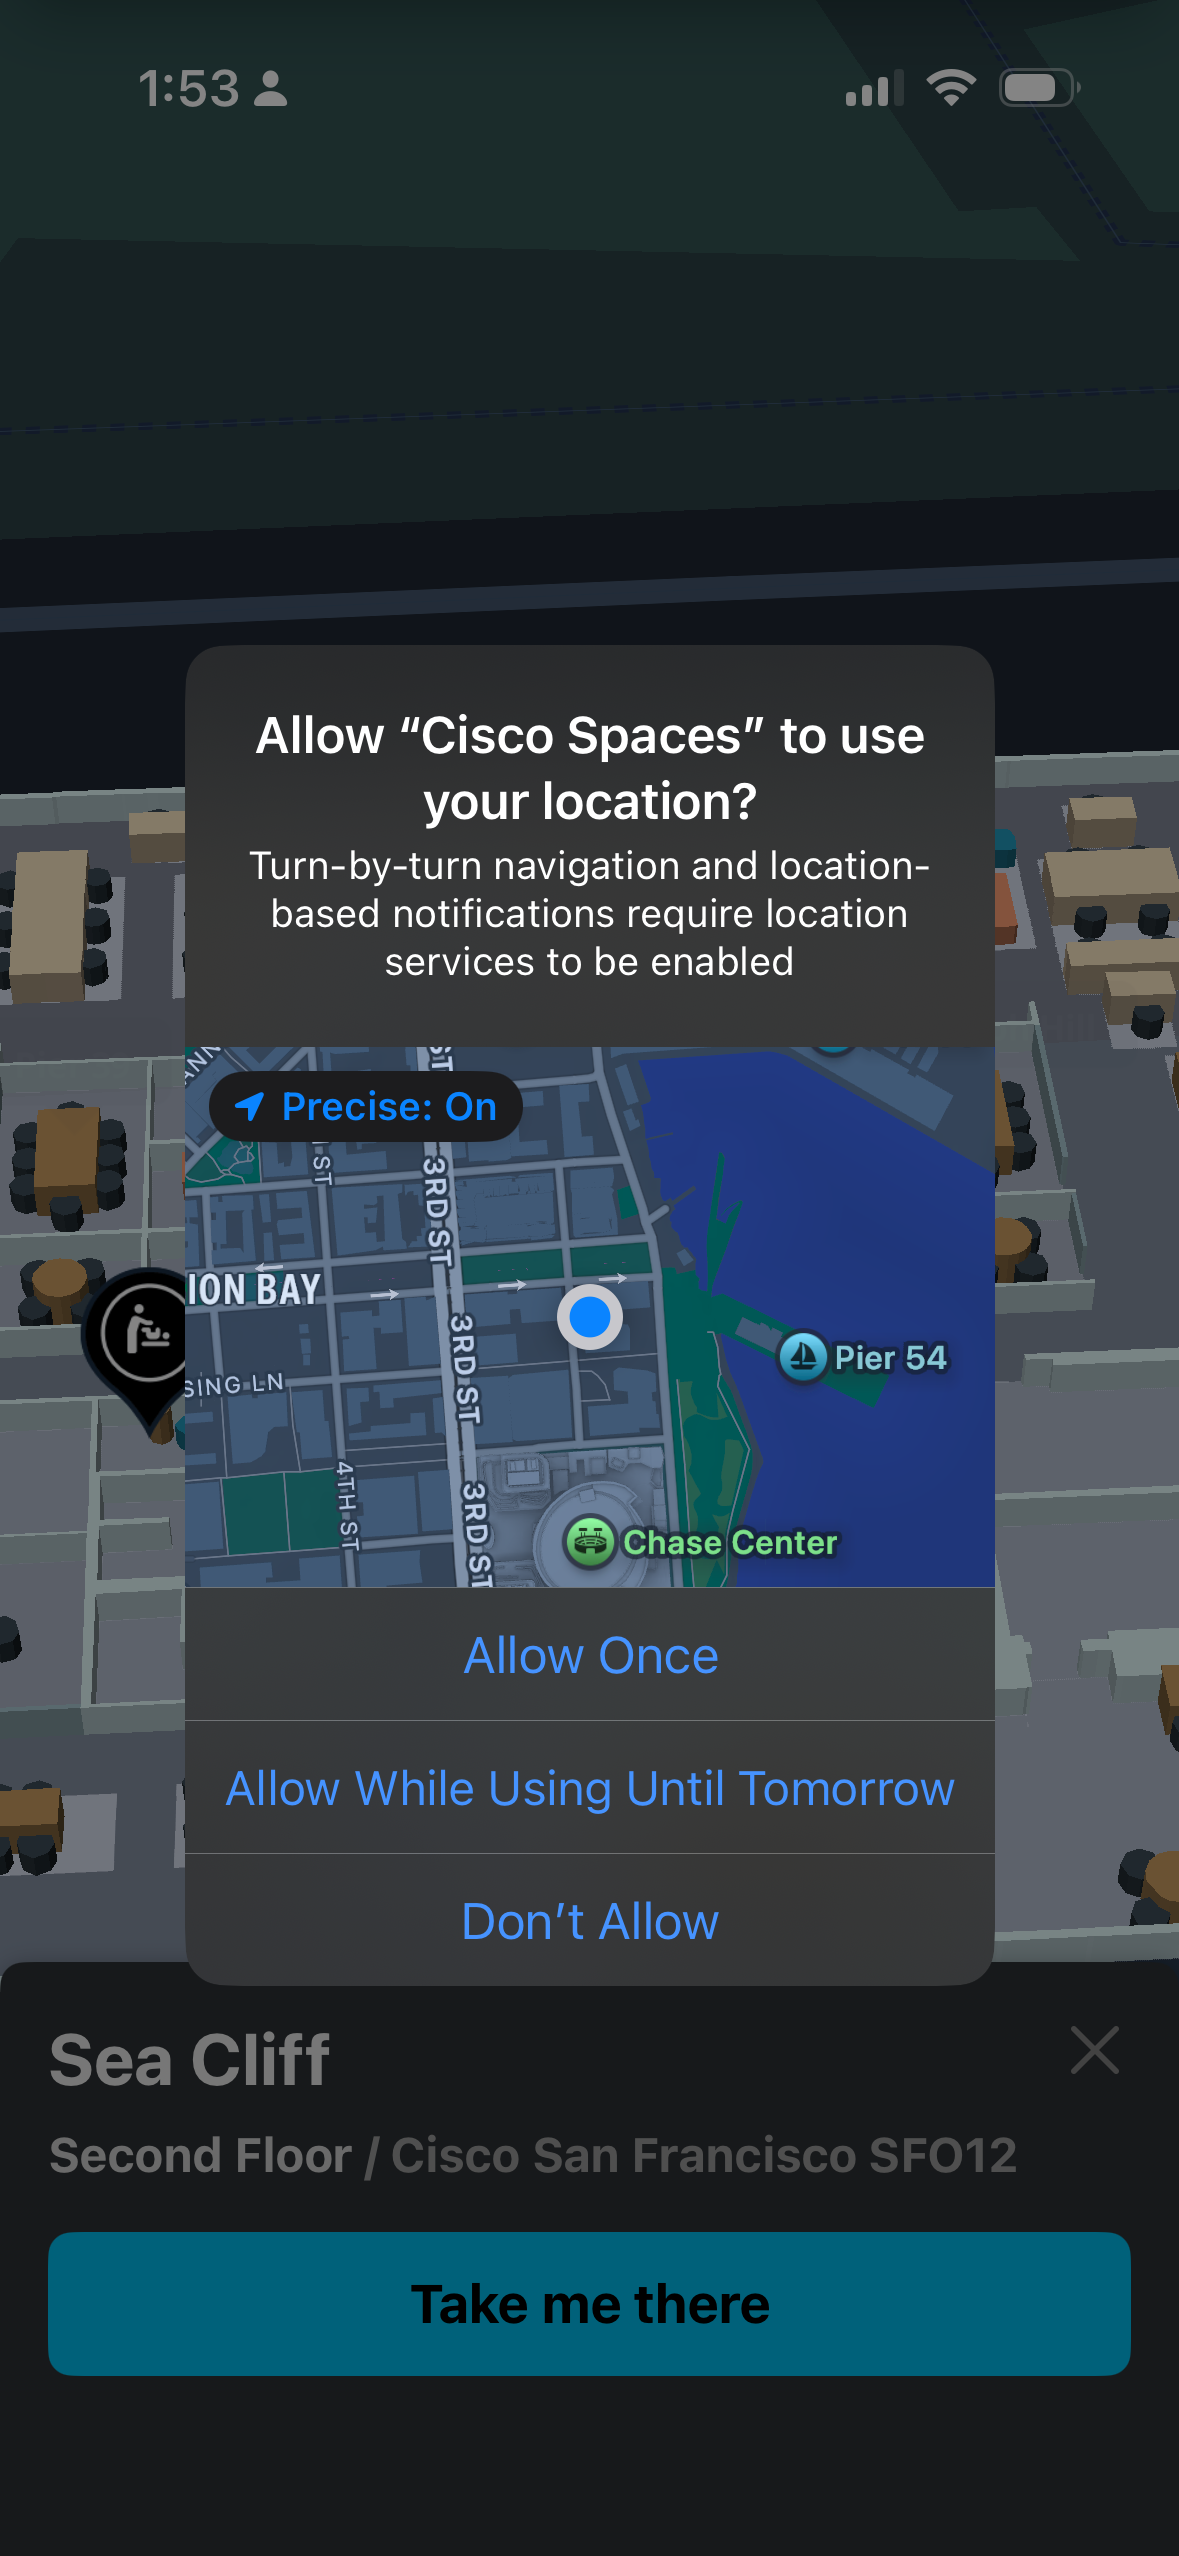
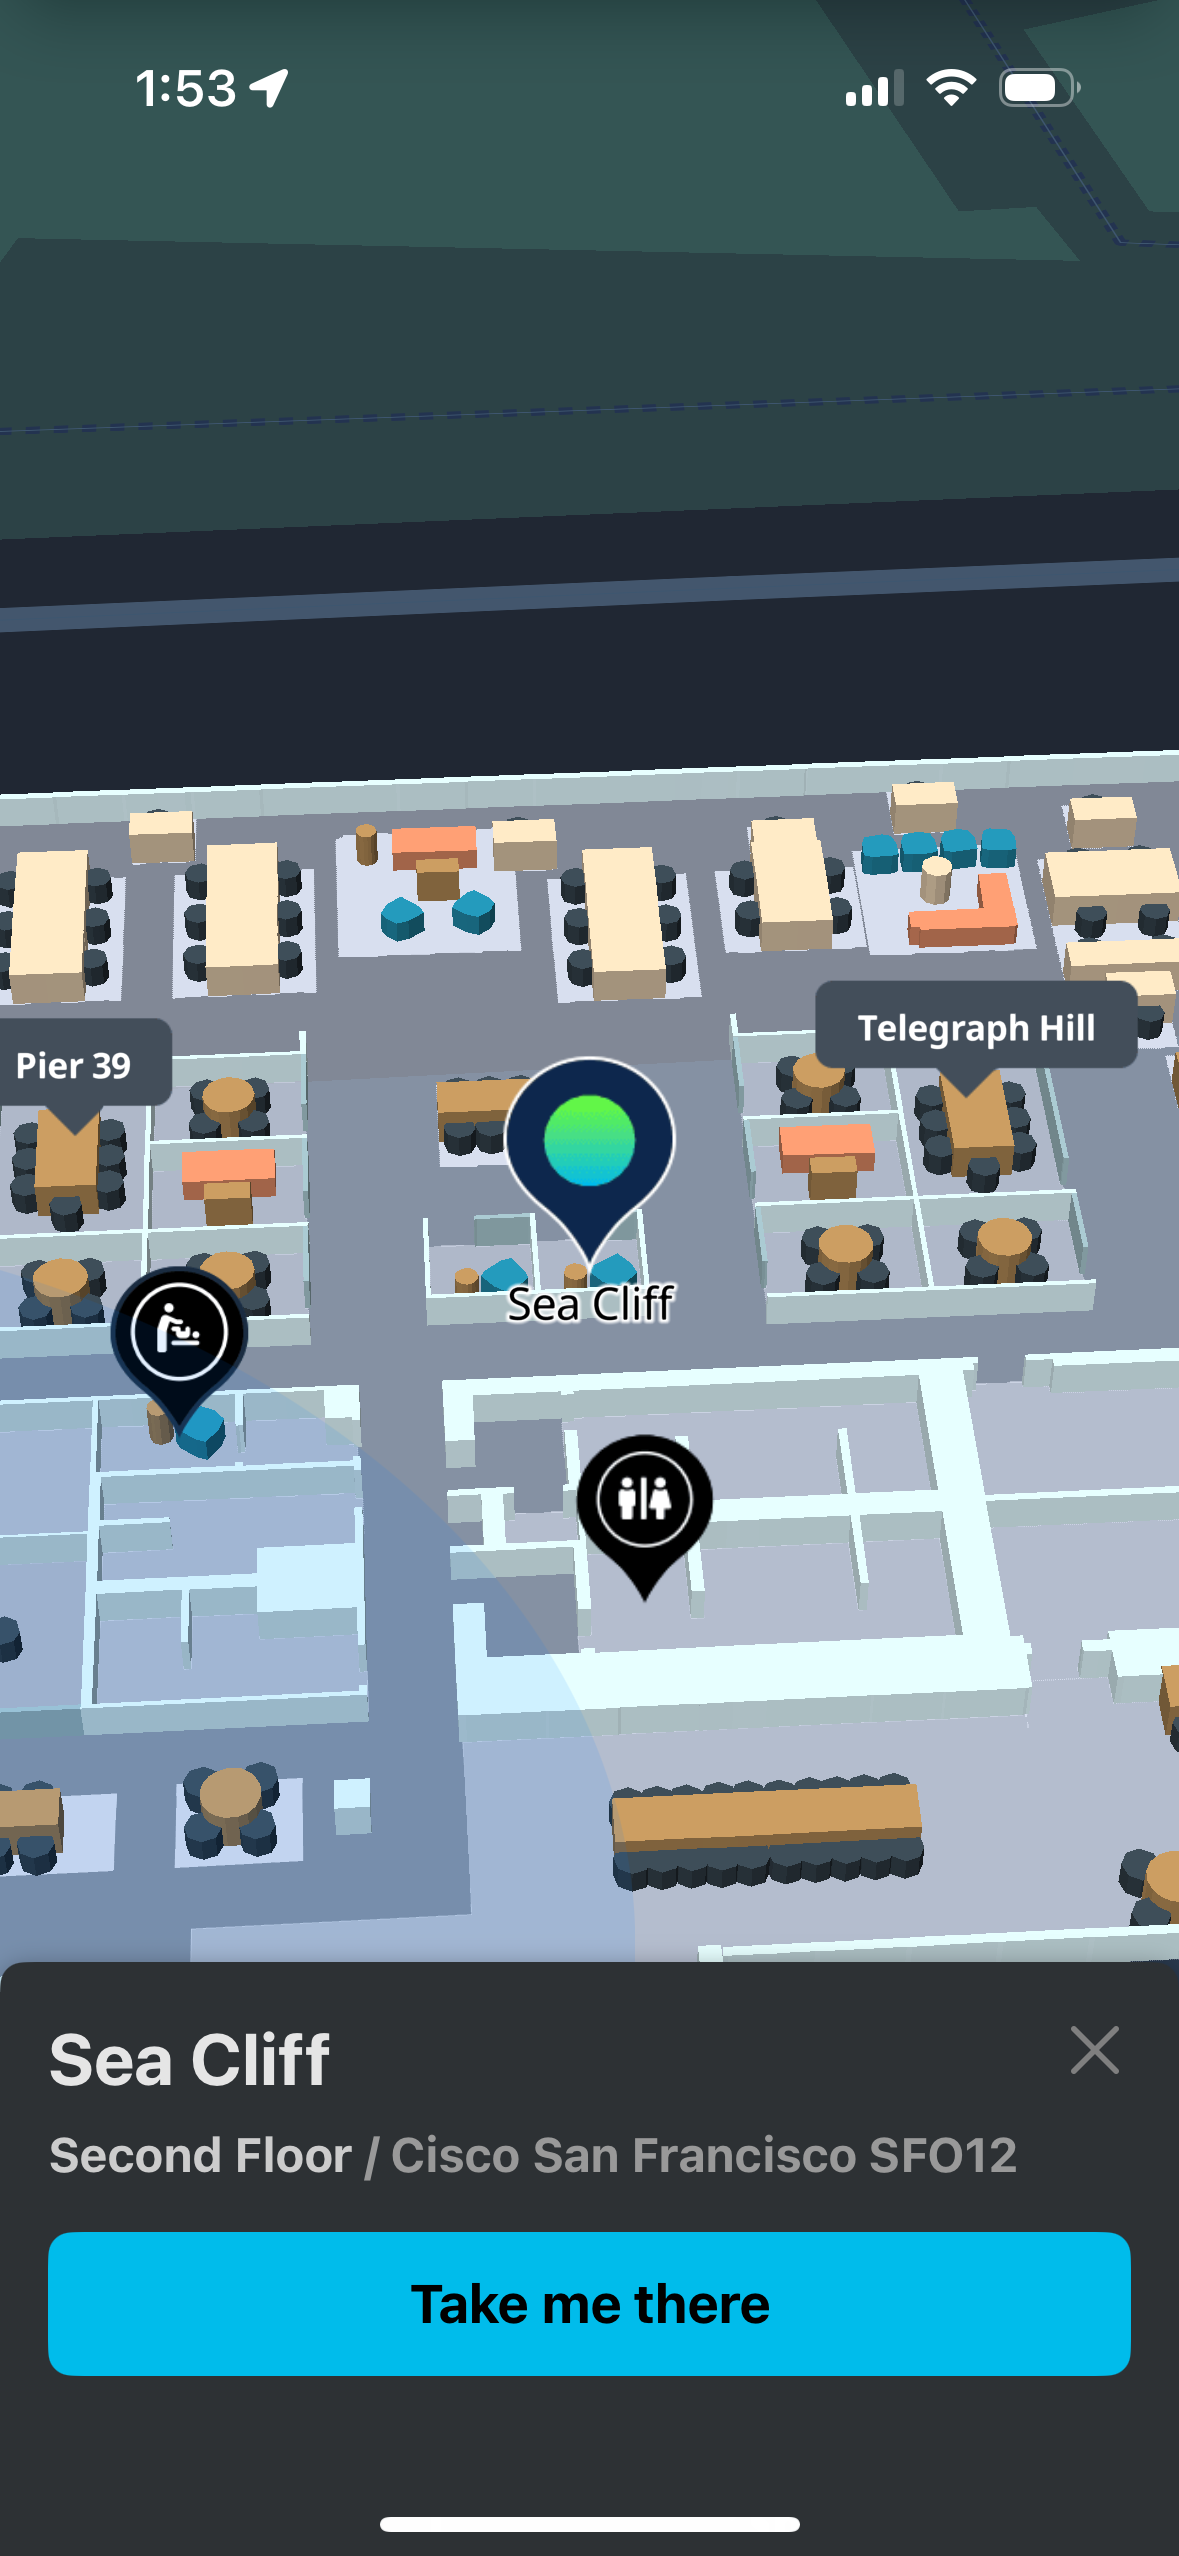
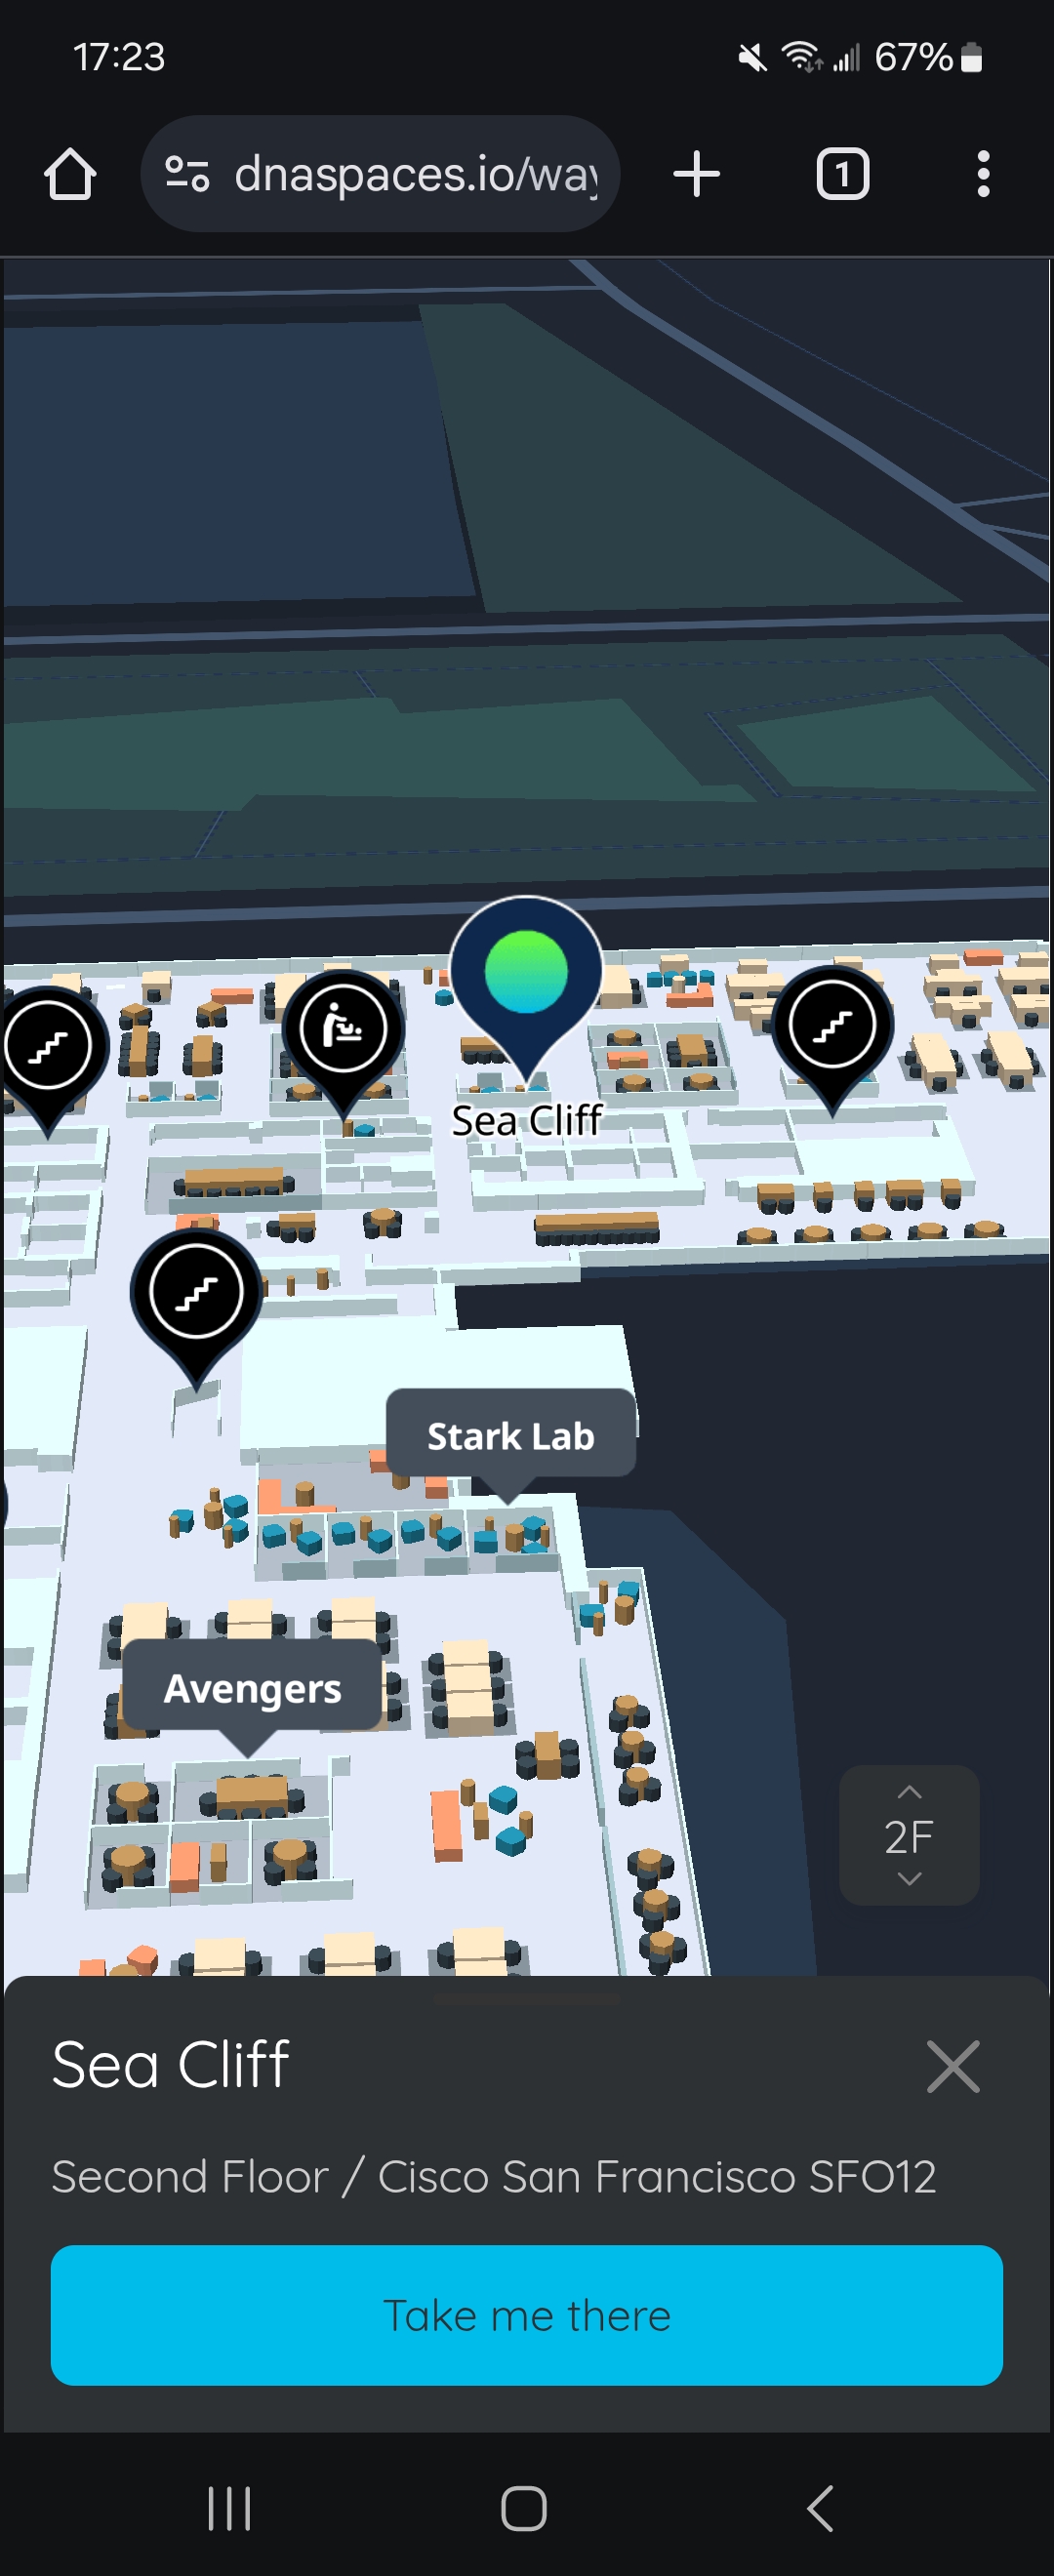
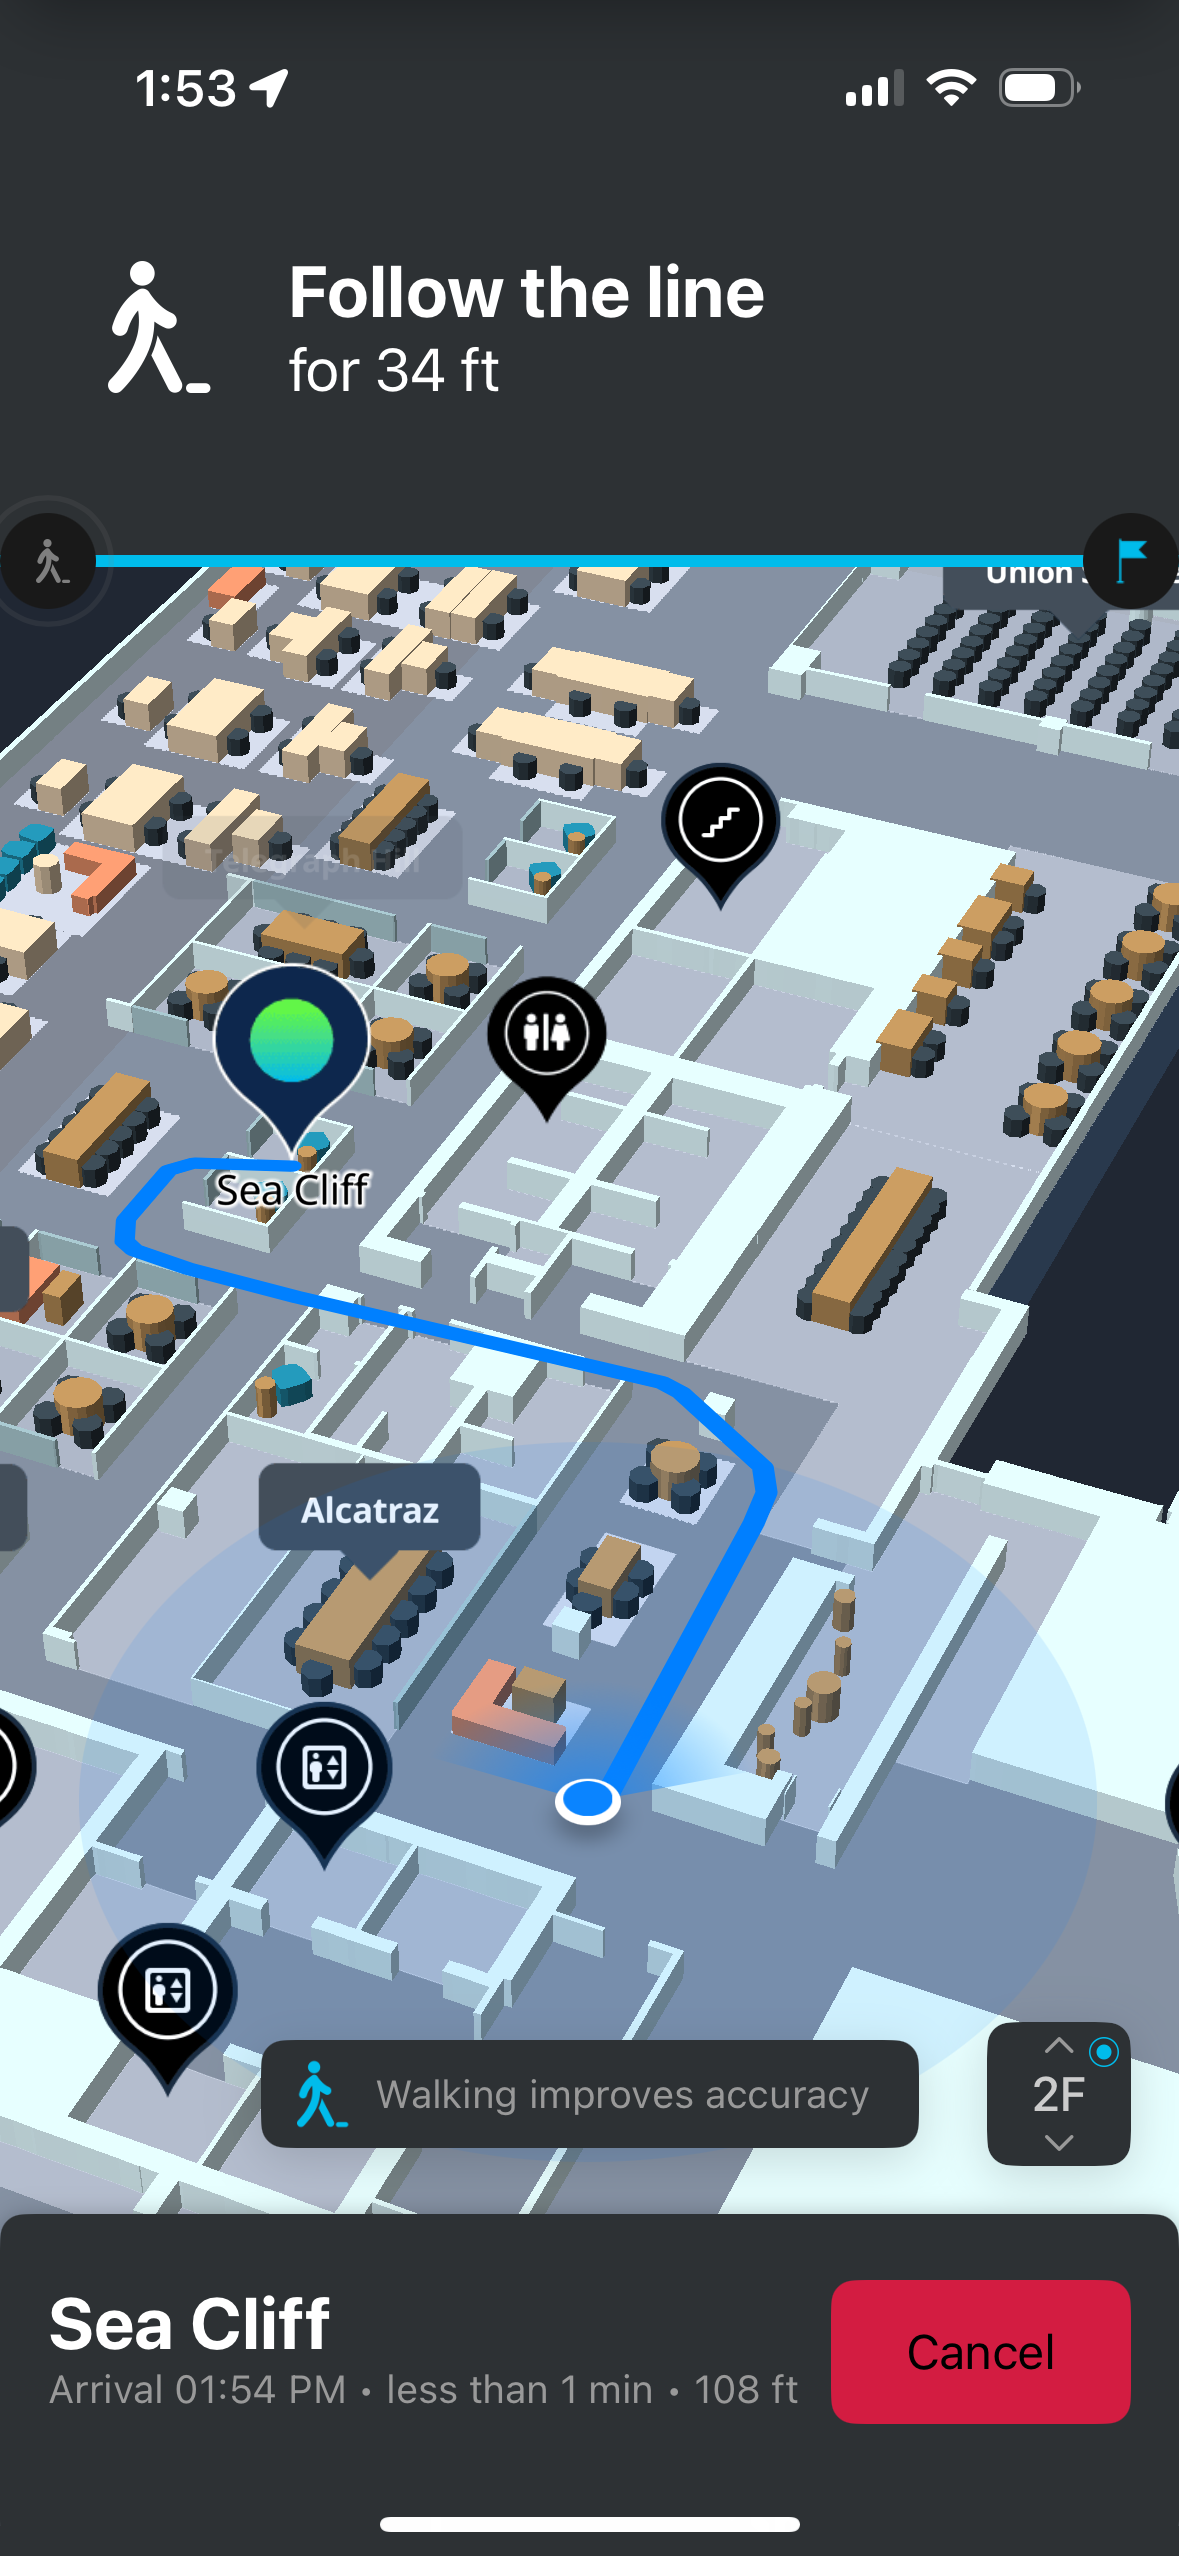
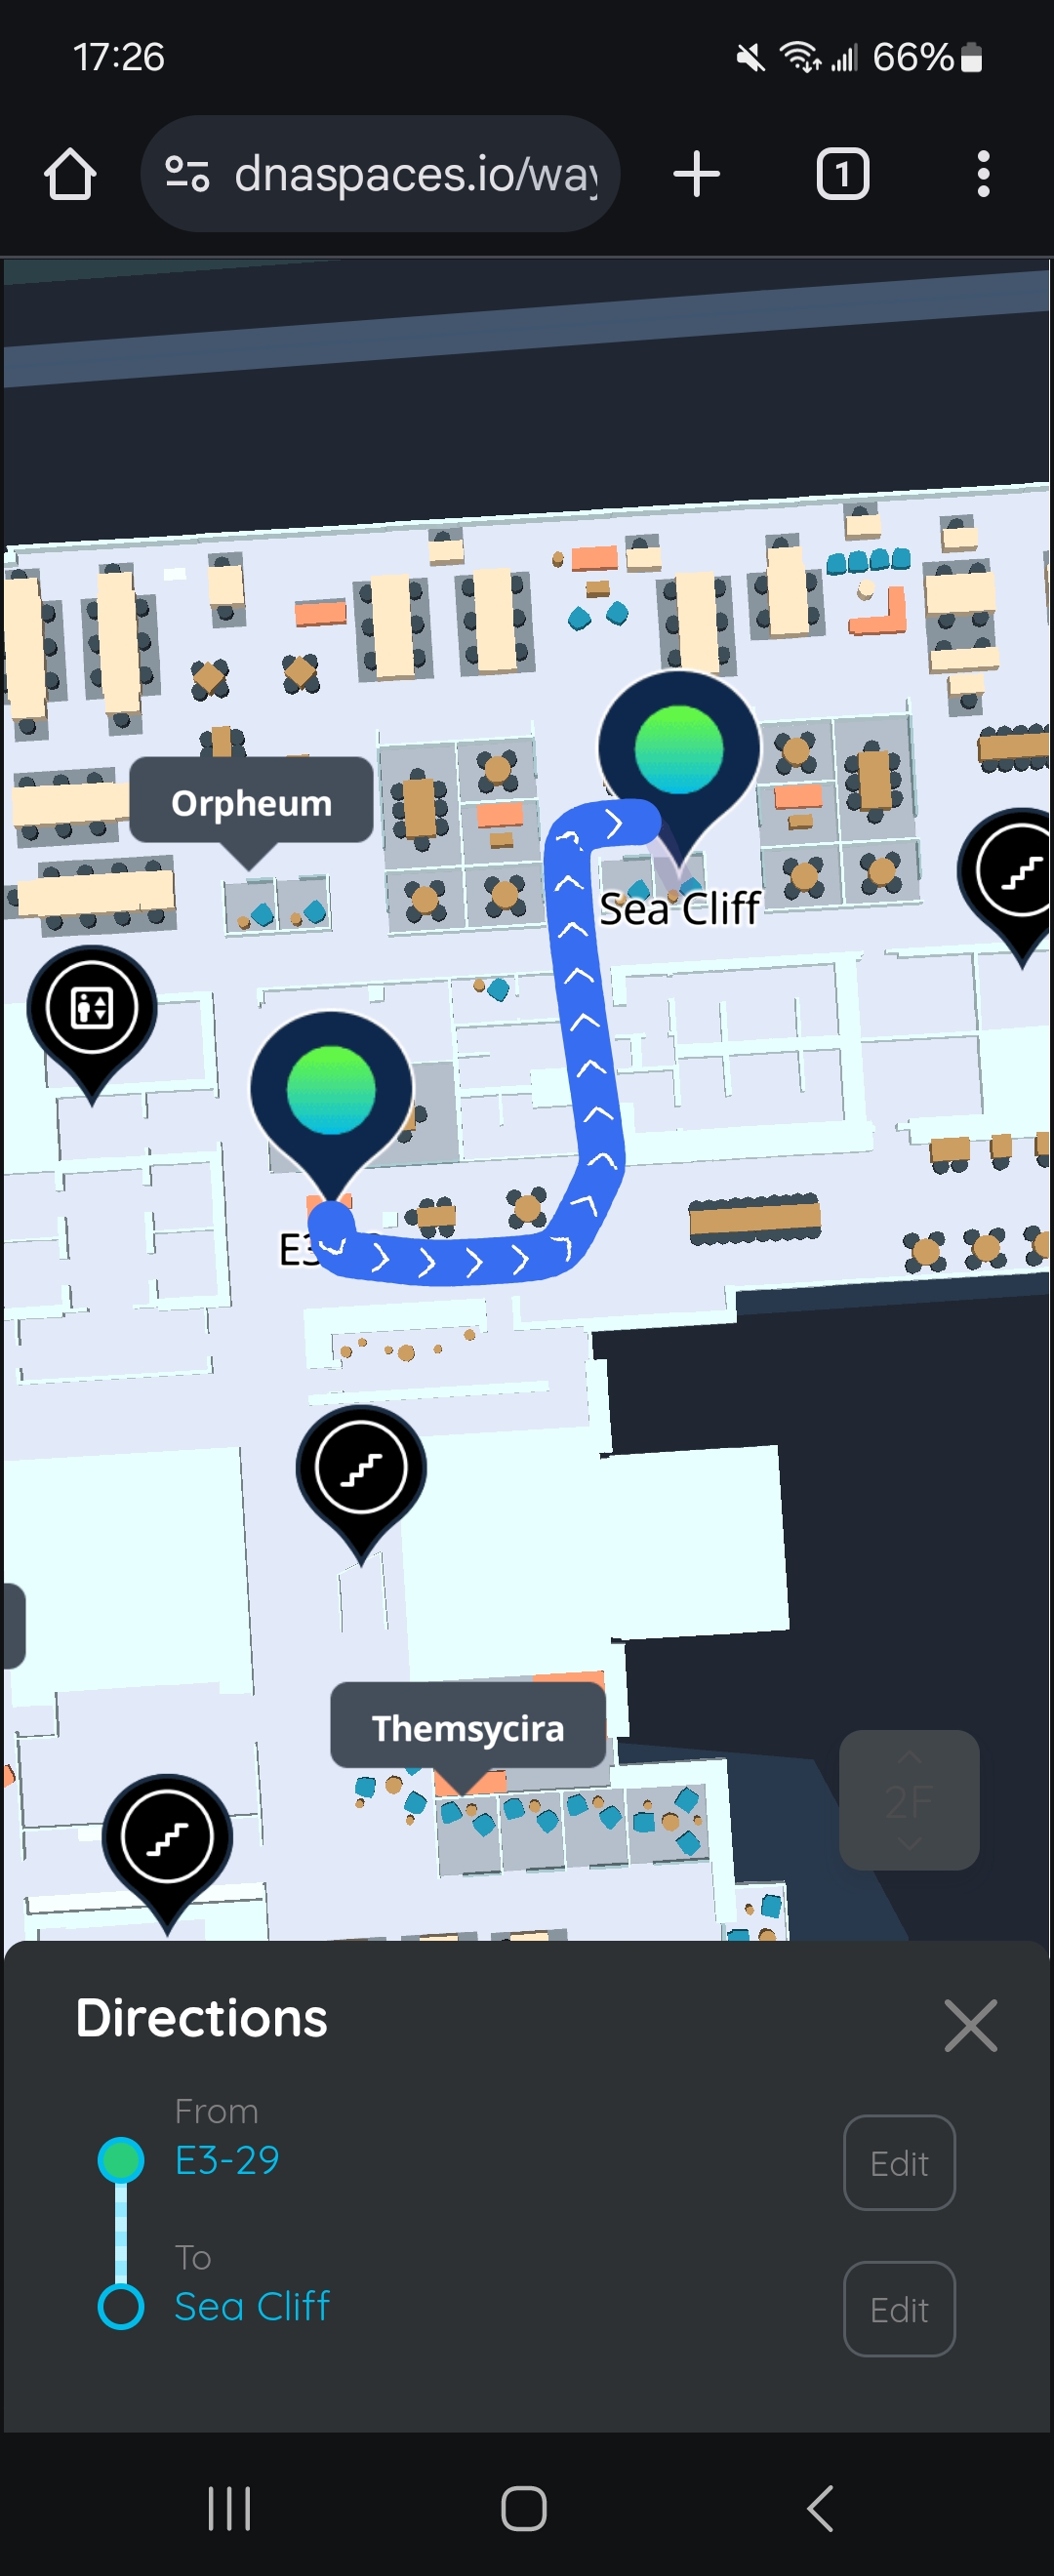
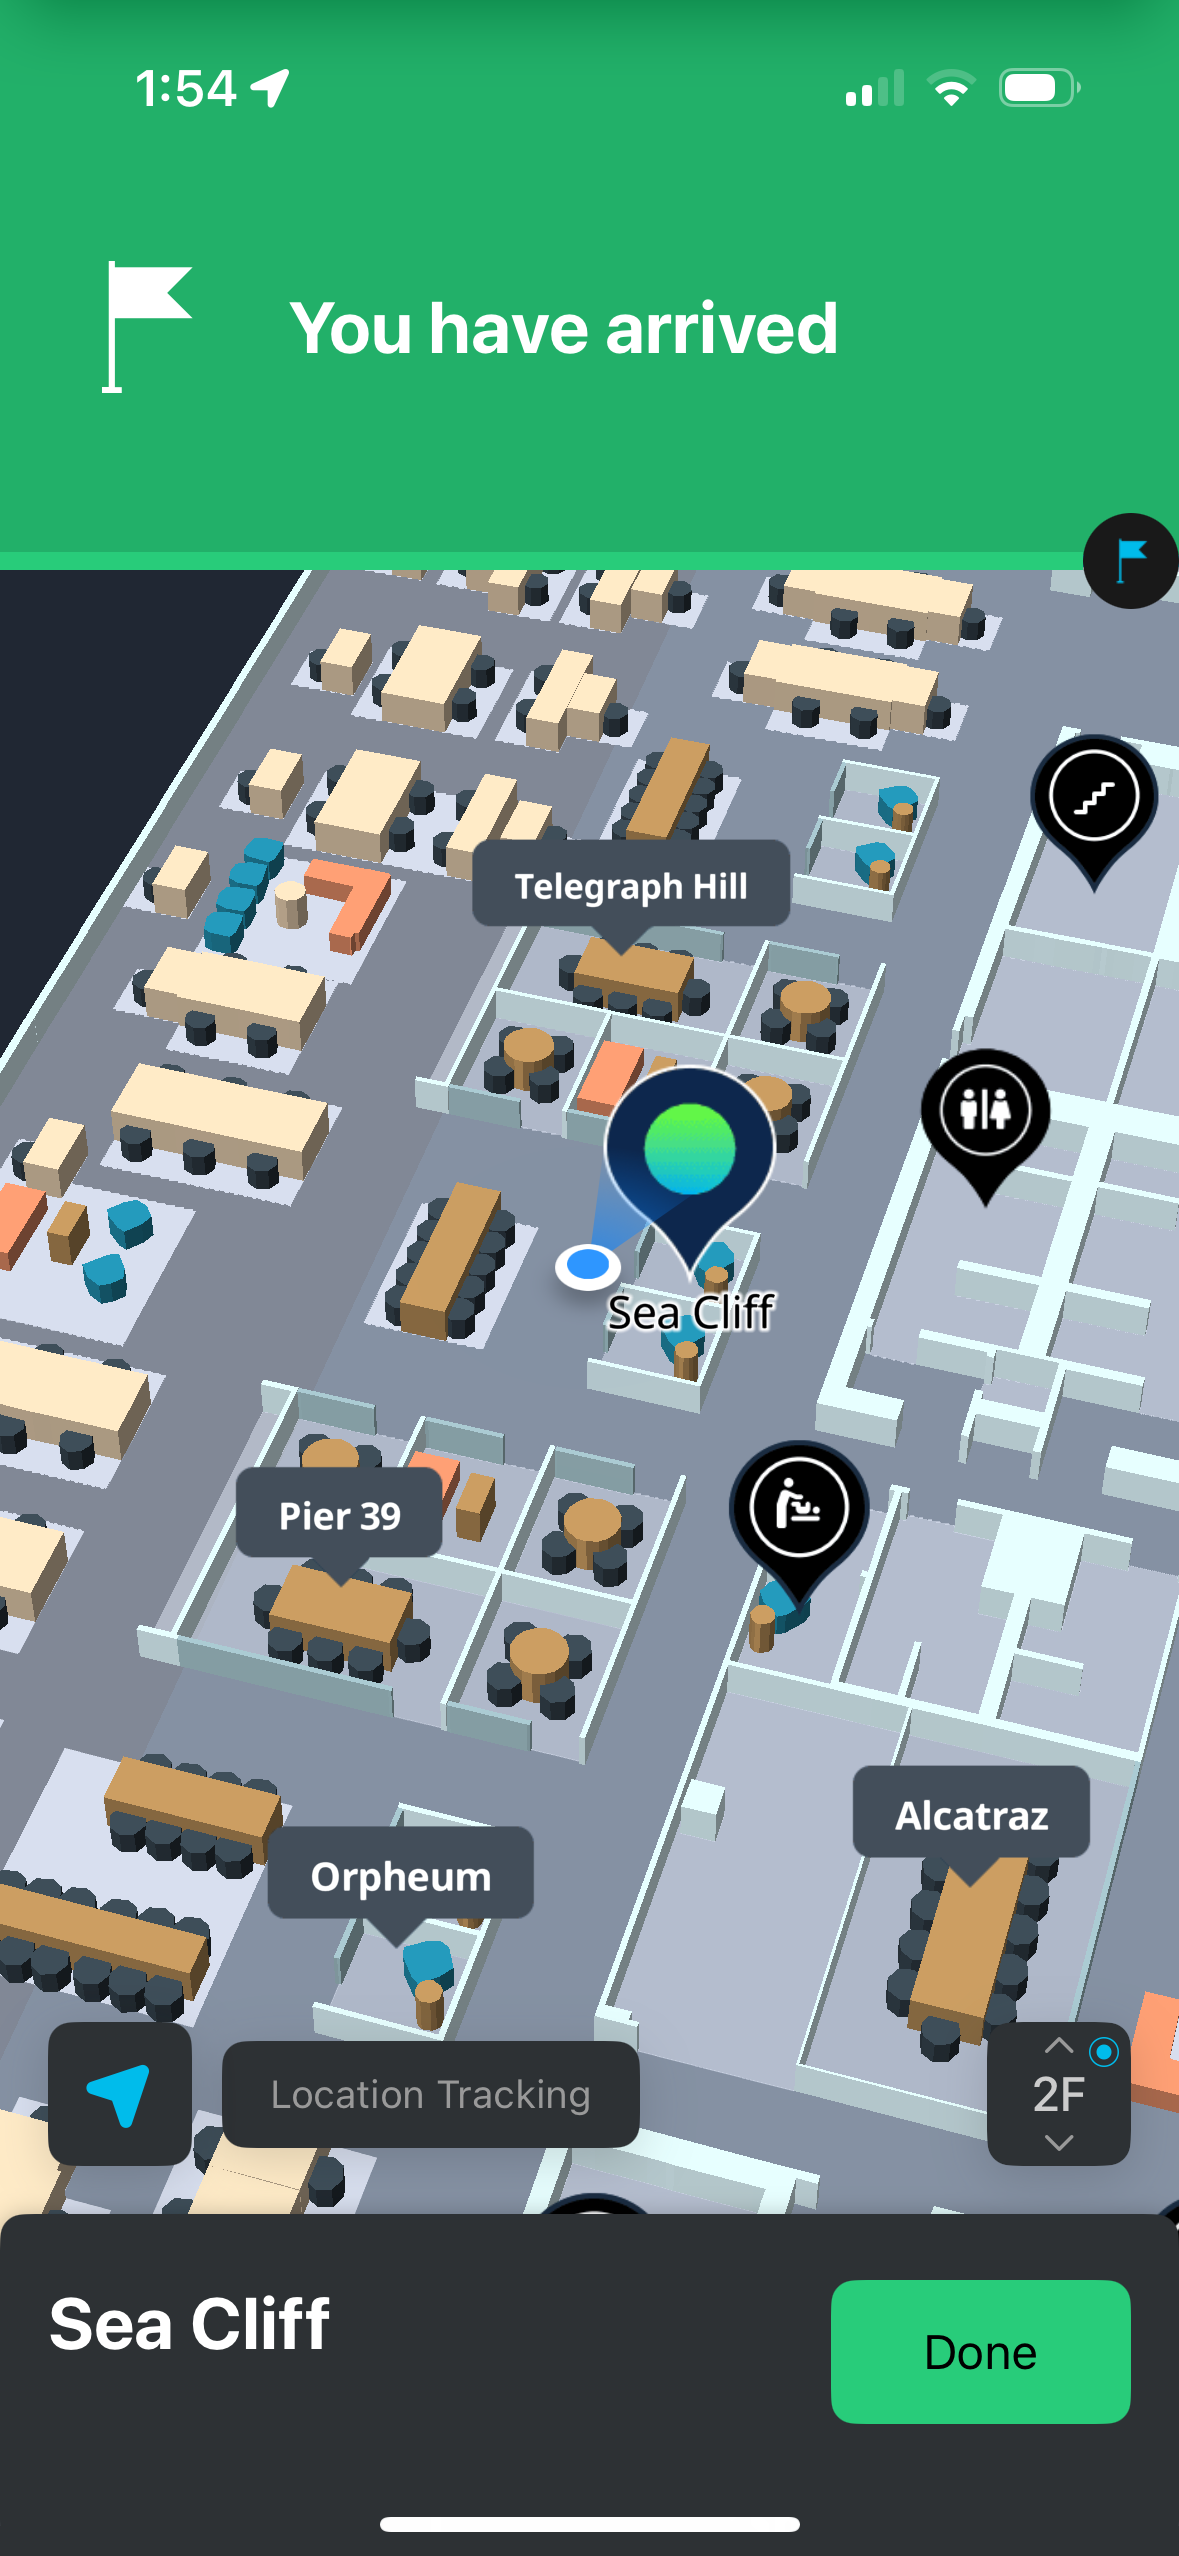
How to Experience Indoor Navigation
Indoor navigation is experienced on a mobile device to give someone turn-by-turn directions within a building. Currently there is a disparity in the mobile experience between iPhone and Android due to limitations with accessing parts of the hardware. An Android application is currently in development to allow for parity in the wayfinding experience. Illustrations between the current experience of the two platforms are contained below.
Currently the only language supported in the App Clip is english.
iPhone | Android | |
|---|---|---|
|  | |
|  | |
|  |  |
|  | N/A |
|  | N/A |
|  |  |
| N/A | 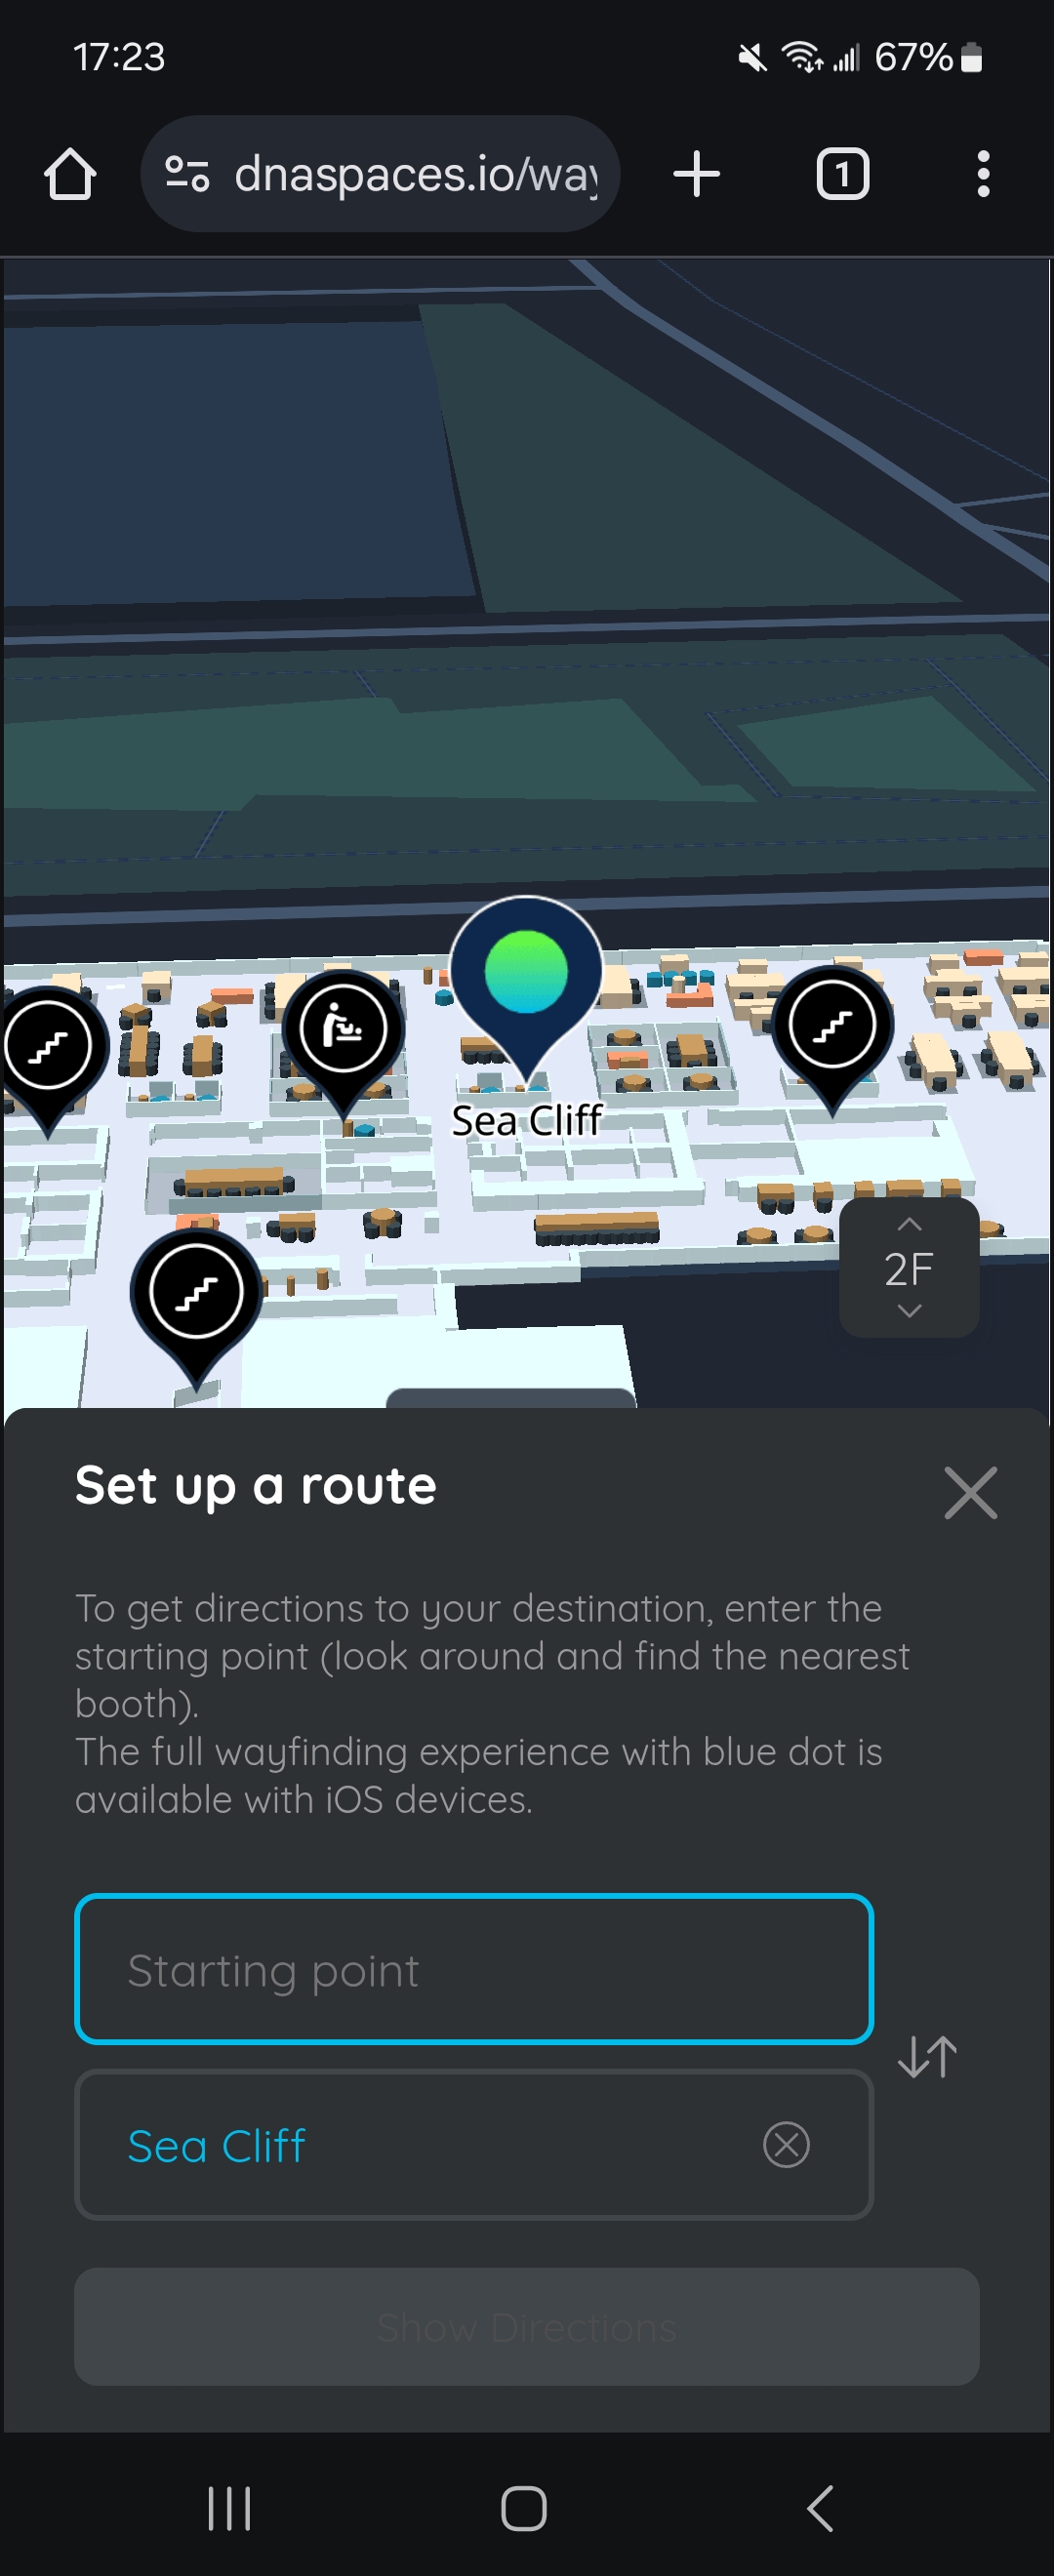 |
|  |  |
|  | N/A |
FAQ
Does enabling indoor navigation have any impact on WiFi usage?
Enabling BLE has minimal interference with Wi-Fi
BLE advertisement is transmitted on 3 channels – 1MHz wide whereas Wi-Fi has a 22 MHz channel bandwidth in 2.4GHz frequency range
If any single advertising channel for BLE is blocked, the other channels are likely to be free since they’re separated by quite a few MHz of bandwidth
BLE channels are strategically placed to avoid interference from WiFi channels Ch1, 6, and 11
The Tx power for indoor navigation is between -9dBm to 0dBm for BLE whereas WiFi transmits at ~20dBm
Low Tx powers of BLE results in insignificant intereference with Wi-Fi. On the other hand, BLE avoids interference by hopping between multiple channels placed between Wi-Fi channels
What PII data is collected when a user engages with the Cisco Spaces Indoor Navigation experience?
REFERENCE
Data flow to enable indoor navigation
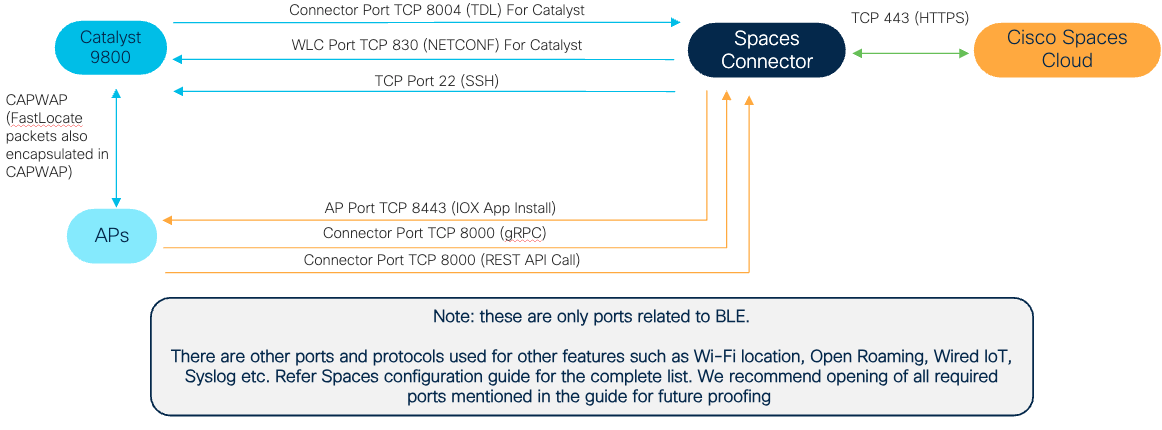
Data ports needed for indoor navigation